15 Essential Lightroom Keyboard Shortcuts to Cut Your Editing Time in Half
If you’ve ever found yourself sitting behind your screen staring at thousands of unedited photos, tweaking sliders one by one until your eyes cross... take a deep breath. I’ve been there, and I’m here to rescue you from the post-processing hamster wheel!
The secret to speeding up your editing isn't moving your mouse faster—it's editing smarter. Learning just a handful of simple Lightroom keyboard shortcuts will seriously shave hours off your workflow, getting you away from your desk and back out enjoying your life (or taking more gorgeous photos).
Because I love saving the day, I’ve organized all of these by topic for you. You’re welcome! 😉

1. Lightning-Fast Culling & Organization Shortcuts
Culling is where most photographers get completely bogged down. Use these shortcuts in the Library Module to breeze through your RAW files without breaking a sweat:
E (Loupe View) & G (Grid View): Toggle back and forth between inspecting a single photo close-up (E) and seeing all your thumbnails at once (G).
1 through 5 (Star Ratings): Instantly rate your images from 1 to 5 stars as you go.
6 through 9 (Color Labels): Slap a color label (Red, Yellow, Green, Blue) on photos to organize different locations or mini-sessions.
P (Pick) & X (Reject): The ultimate culling secret weapon. Press P to flag a keeper, or hit X to mark an out-of-focus shot for deletion.
Nancy’s Pro Tip: Turn on Auto-Advance by pressing Caps Lock. Lightroom will automatically jump to the next image the split-second you rate or flag a photo. It’s like magic!
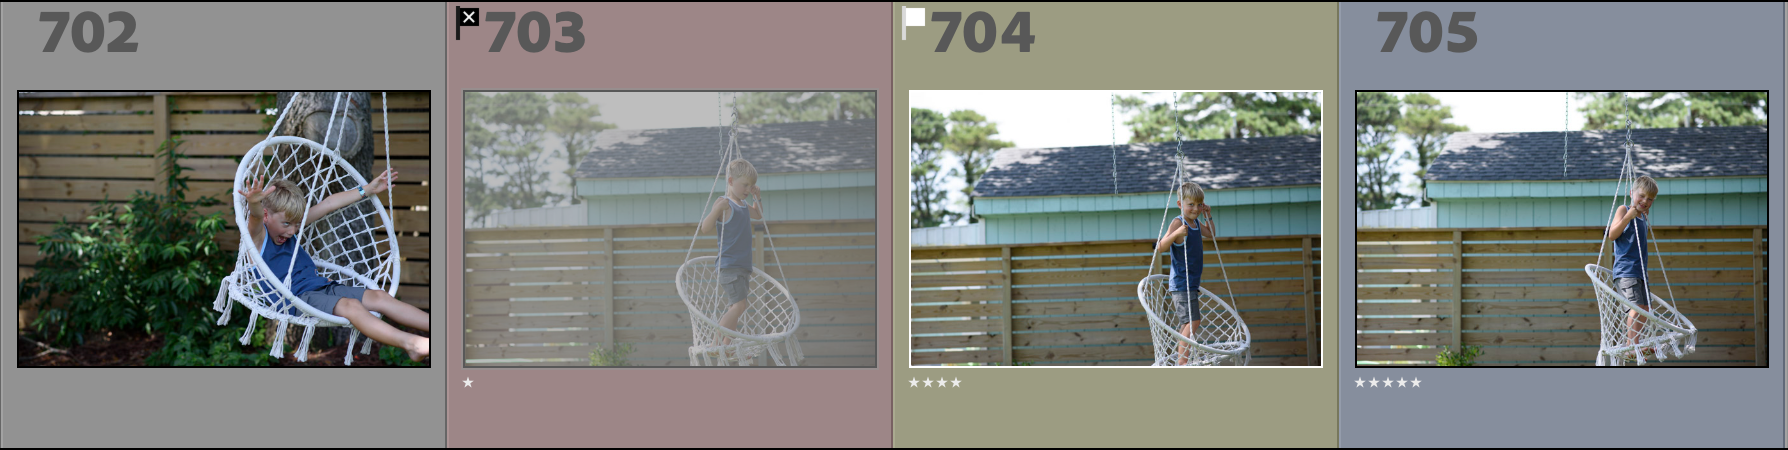
Apply flags, color labels for organization, or star ratings for culling.
2. Essential Development & Editing Shortcuts
When you jump into the Develop Module (D), these keystrokes eliminate constant panel scrolling.
D (Develop Module): Jump straight into editing mode from anywhere.
\ (Toggle Before/After): Press the backslash key to see instant side-by-side comparison between your original RAW import and your current edit.
V (Black & White Conversion Matrix): Instantly switch your photo to monochrome to evaluate tone and contrast before deciding on a black and white edit.
Cmd + C / Cmd + V (Mac) or Ctrl + C / Ctrl + V (Windows): Copy and paste settings between similar photos.
Cmd + Shift + C (Mac) or Ctrl + Shift + C (Windows): Opens the Copy Settings dialogue box so you can select specific sliders (like White Balance or Masking) to apply across images.
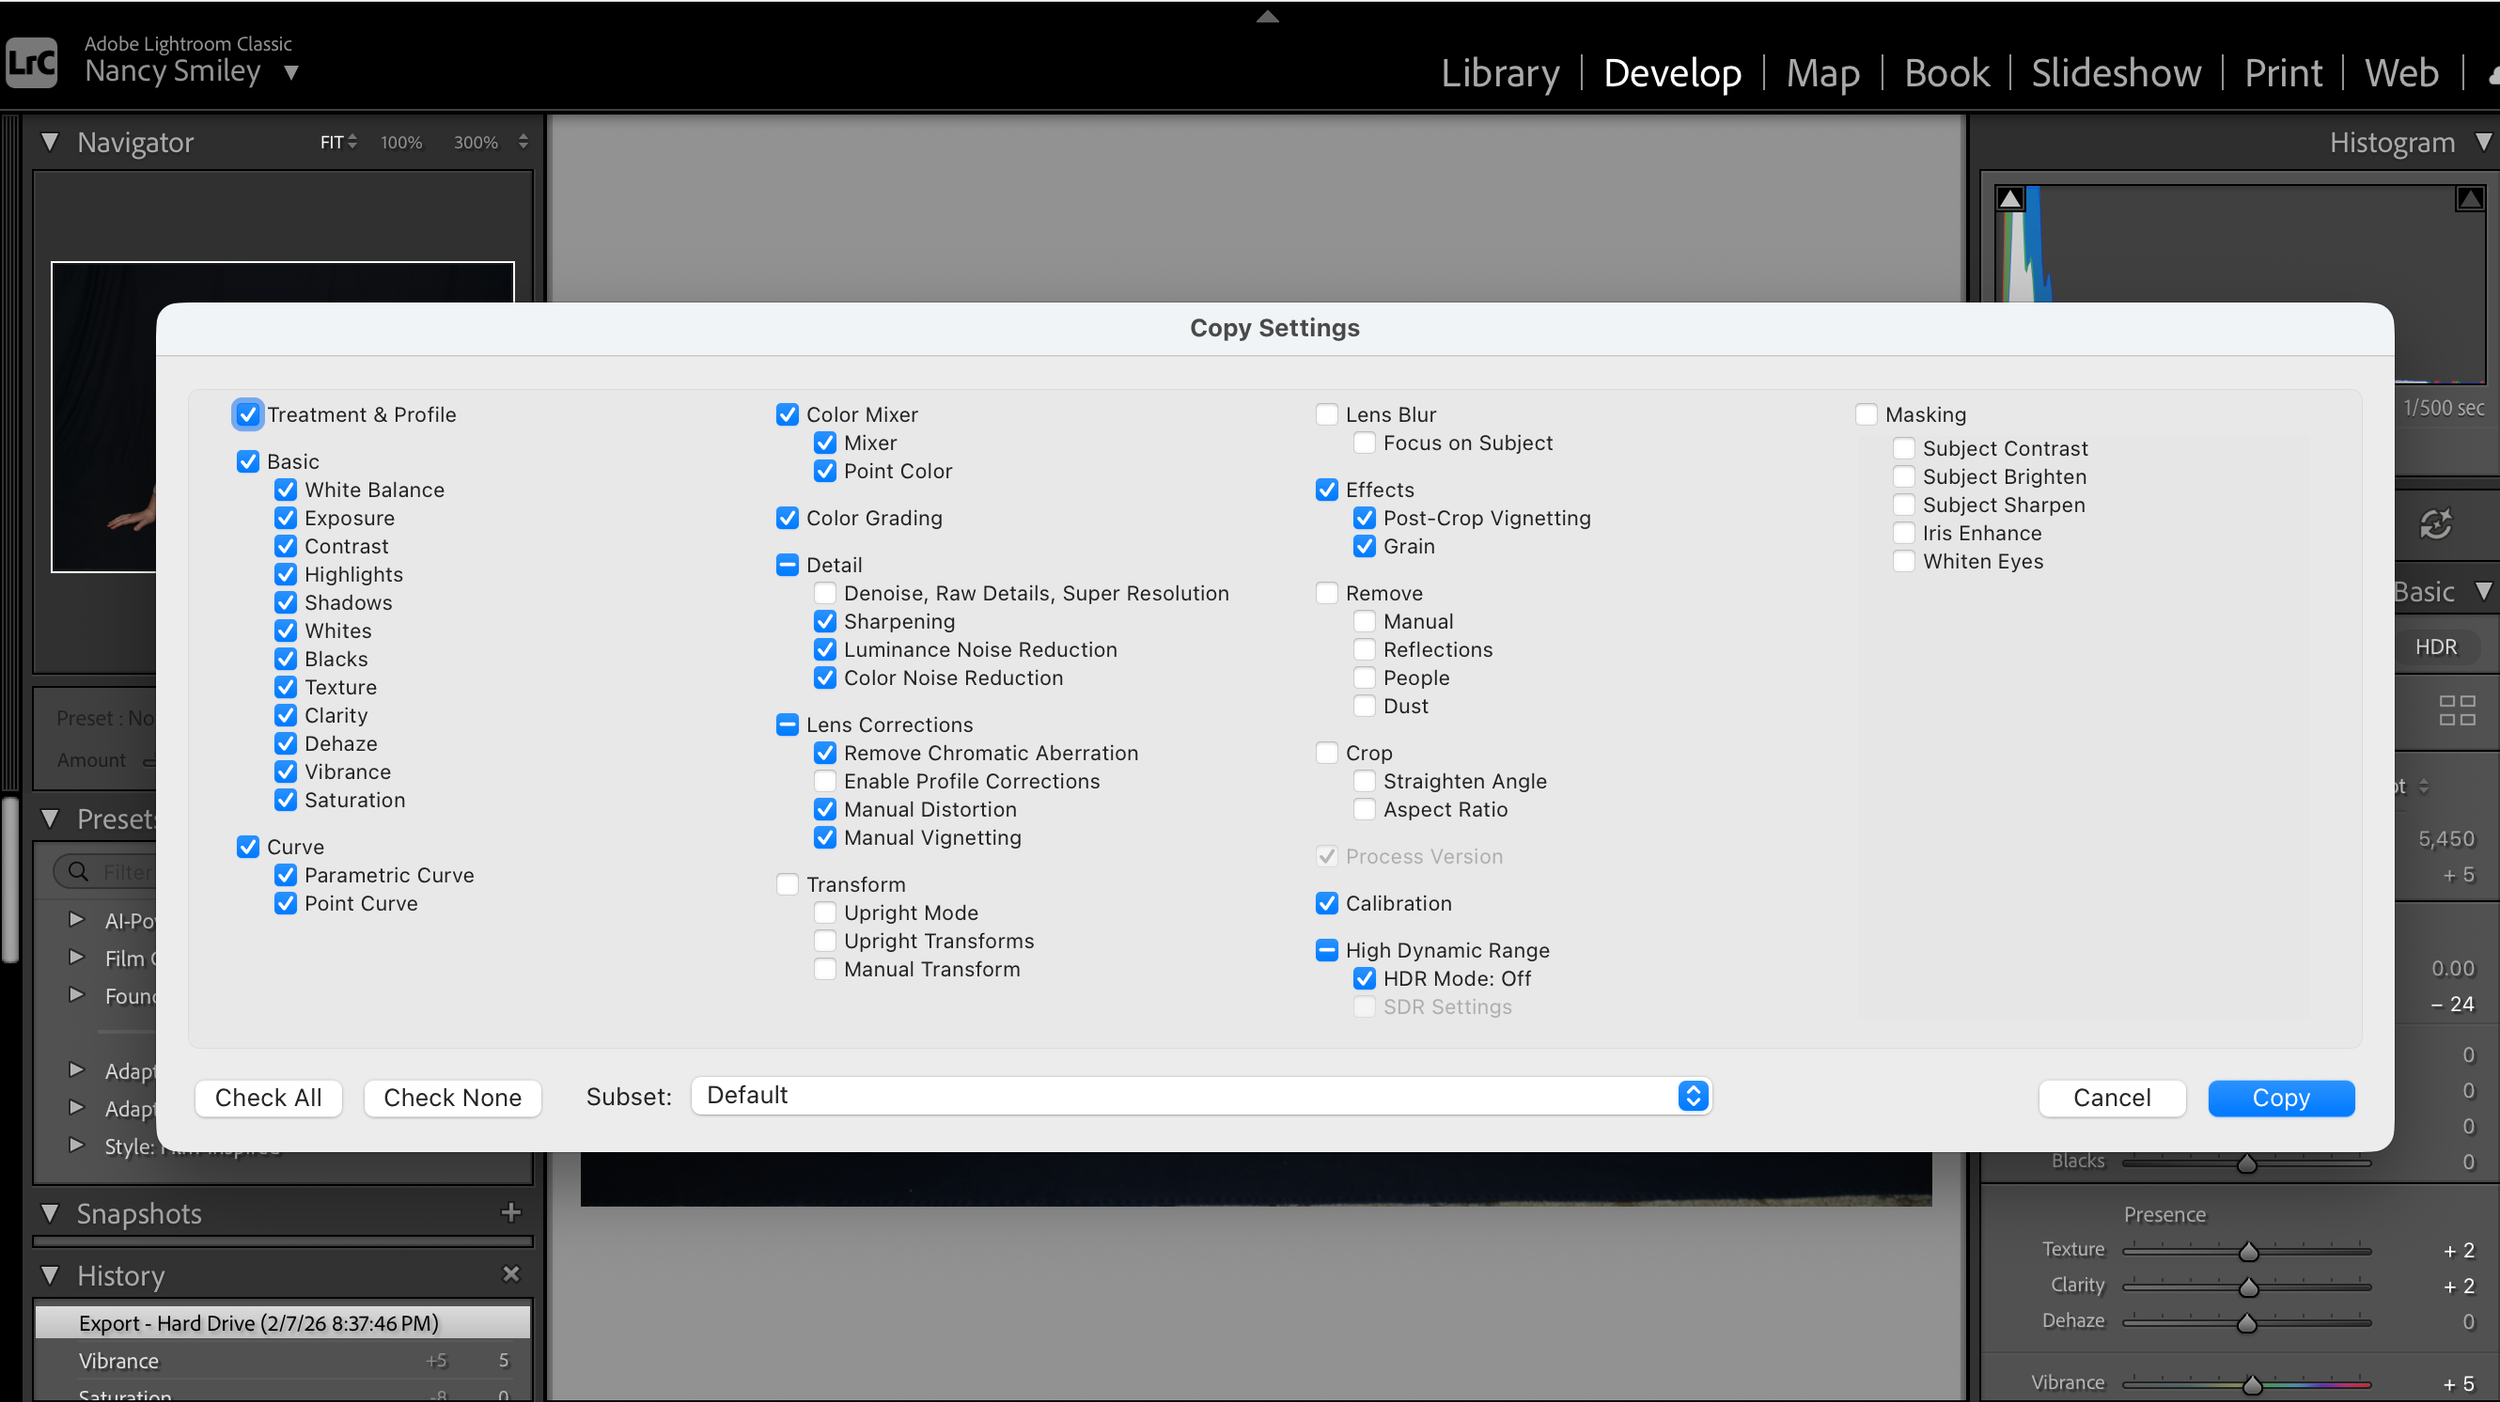
4. Precision Tools & Masking Shortcuts
M (Linear Gradient Mask): Quickly call up a linear gradient to balance skies or brighten foregrounds.
Shift + M (Radial Gradient Mask): Drop a quick radial burst to pop light on your subject.
K (Adjustment Brush): Activate the custom brush tool for localized dodge and burn work.
O (Toggle Mask Overlay): Instantly reveal or hide the red mask overlay to double-check exact brush coverage.
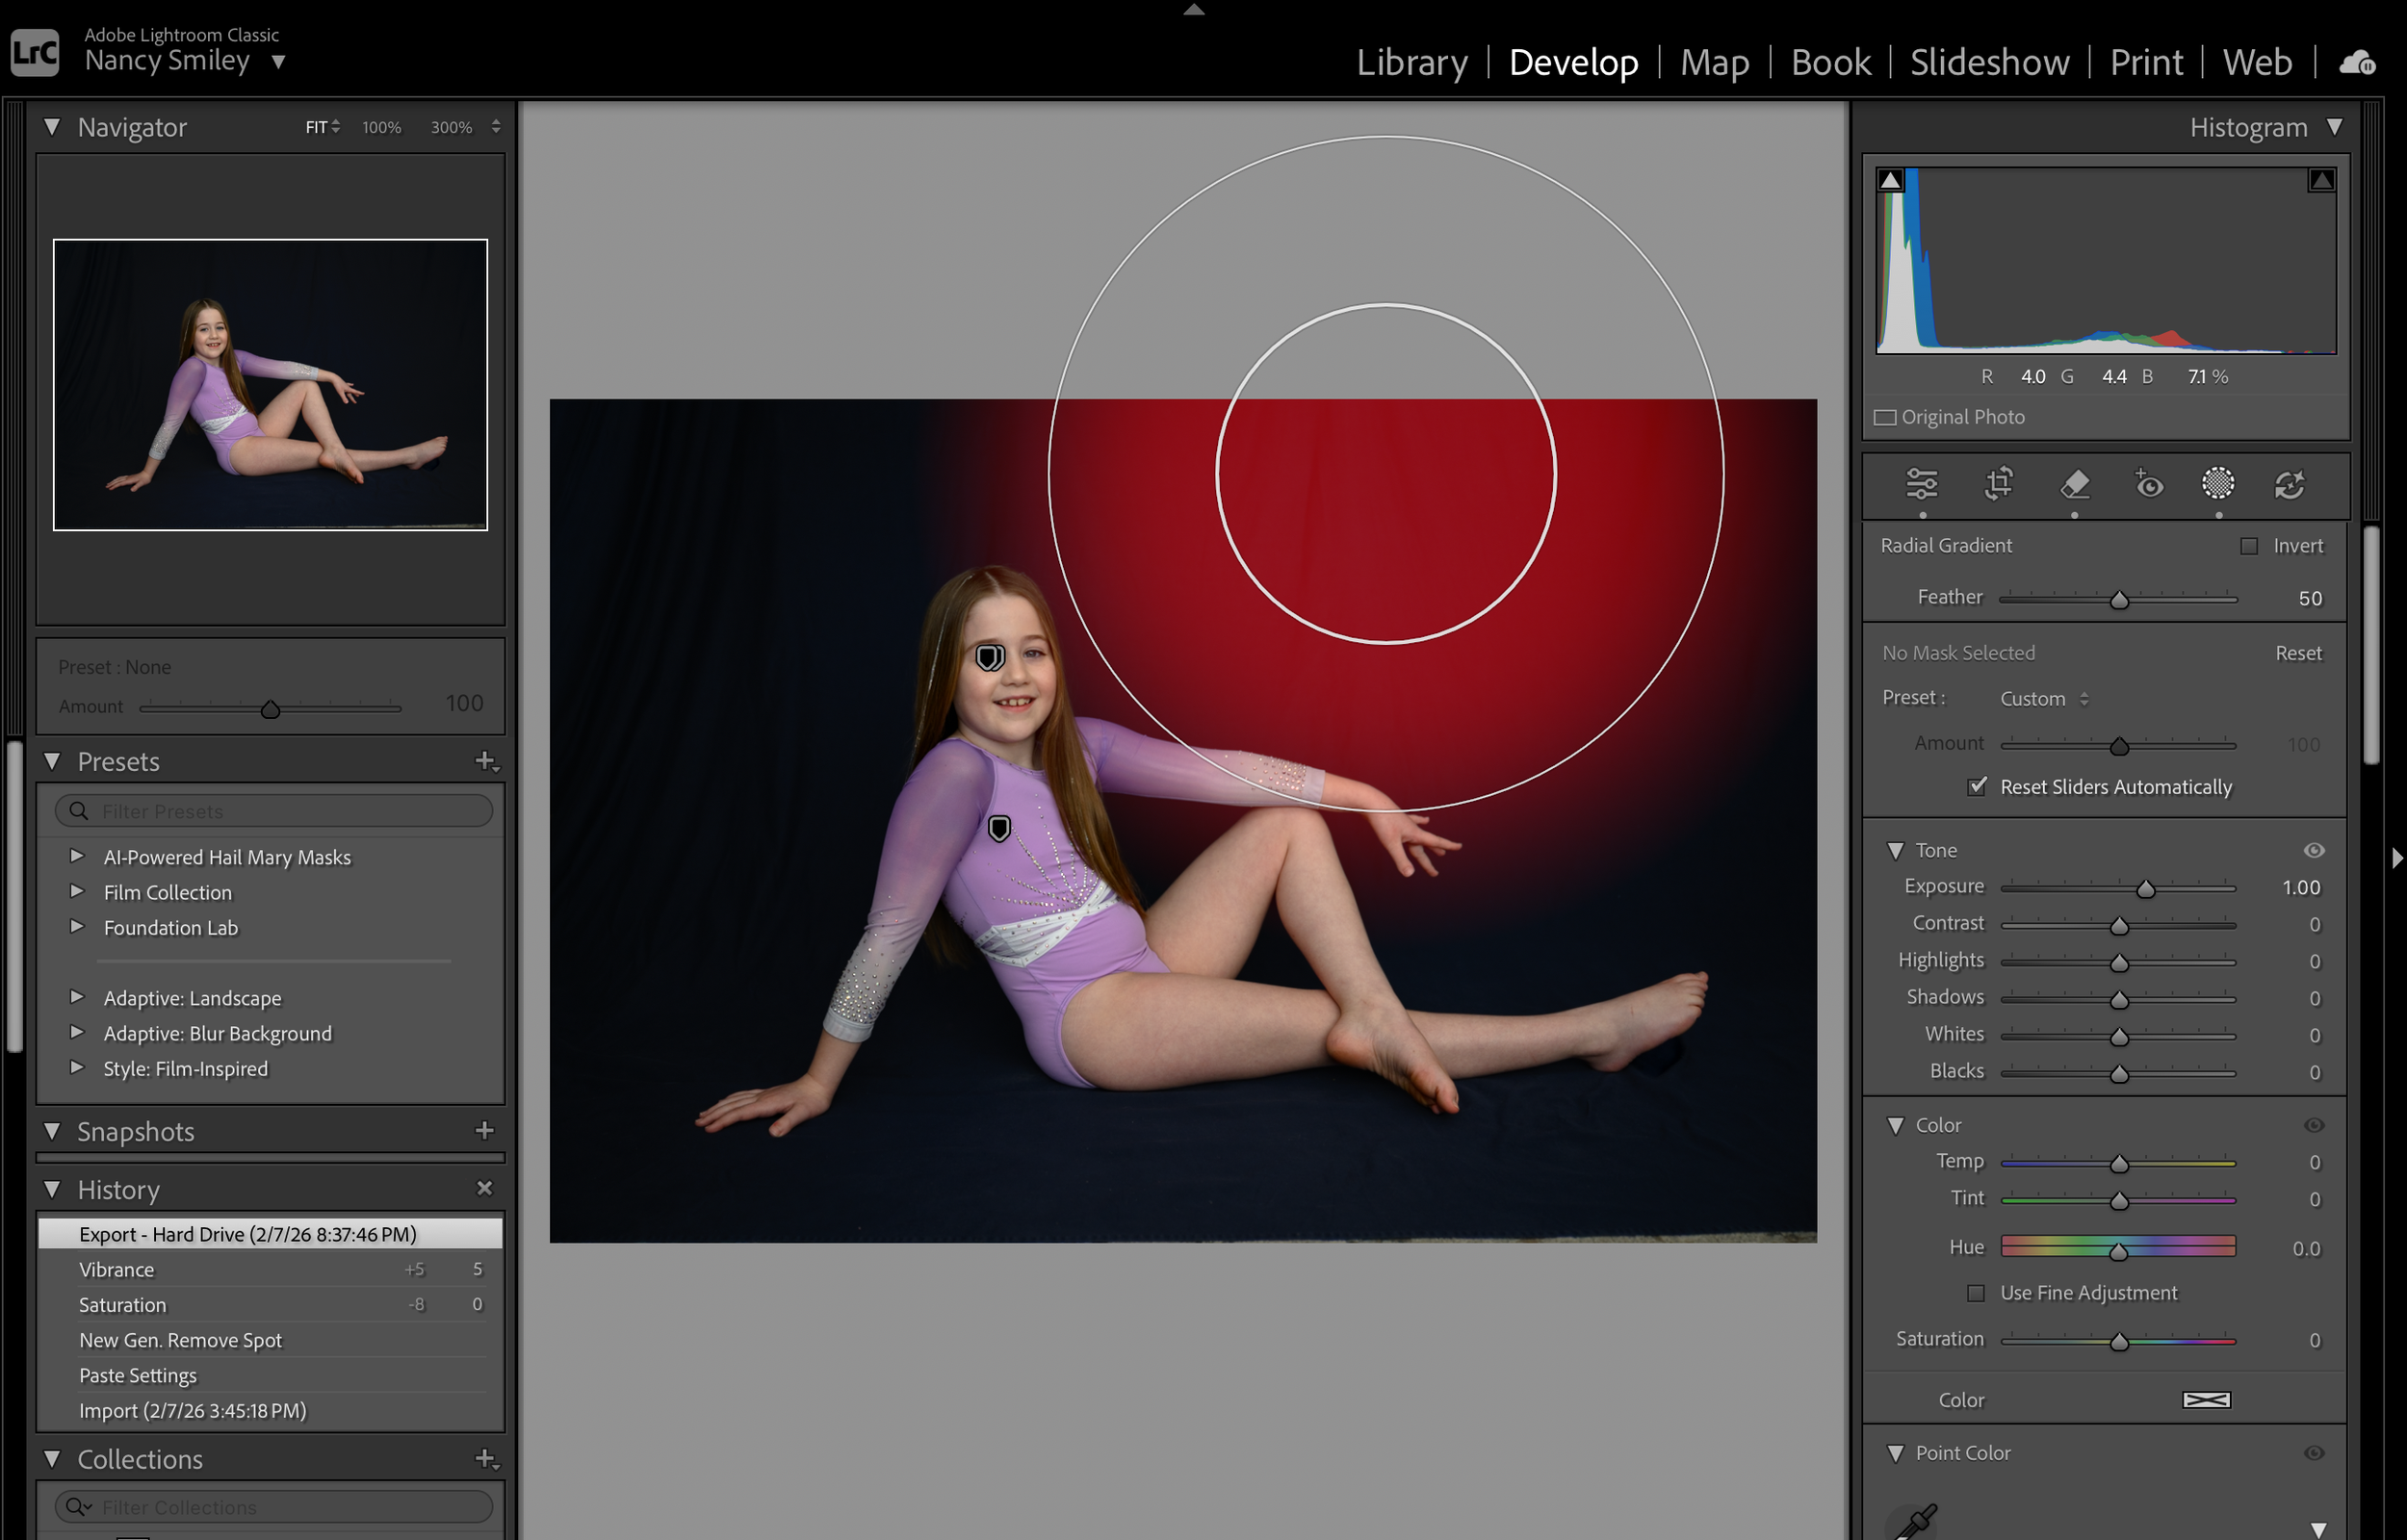
5. How to Customize Keyboard Shortcuts in Lightroom Classic
While Lightroom Classic has built-in defaults for most functions, you can also customize menu shortcuts to better fit your personal workflow:
On macOS (System Level):
Go to System Settings > Keyboard > Keyboard Shortcuts > App Shortcuts.
Click the + button and select Adobe Lightroom Classic.
Type the exact menu command name (e.g., Build Standard-Sized Previews) into the Menu Title box.
Set your custom hotkey combination and click Done.
Using Plugins: Third-party plugins like Any Shortcut or tools like Power Keys allow advanced users to assign custom hotkeys to functions that don't have native menu commands.
Freebies: Let's Get Your Workflow Totally Sorted!
Because I'm not going to leave you hanging with just shortcuts, I've got two awesome free resources to help you streamline everything else:
Download the Free Lightroom Editing Workflow: My exact step-by-step breakdown so you never have to fumble around or second-guess your slider tweaks again.
Download the Free Lightroom Classic Photo Management Mini Guide: Actionable lessons across 5 key areas to simplify your photo organization, complete with time-saving shortcuts for an effortless editing process.
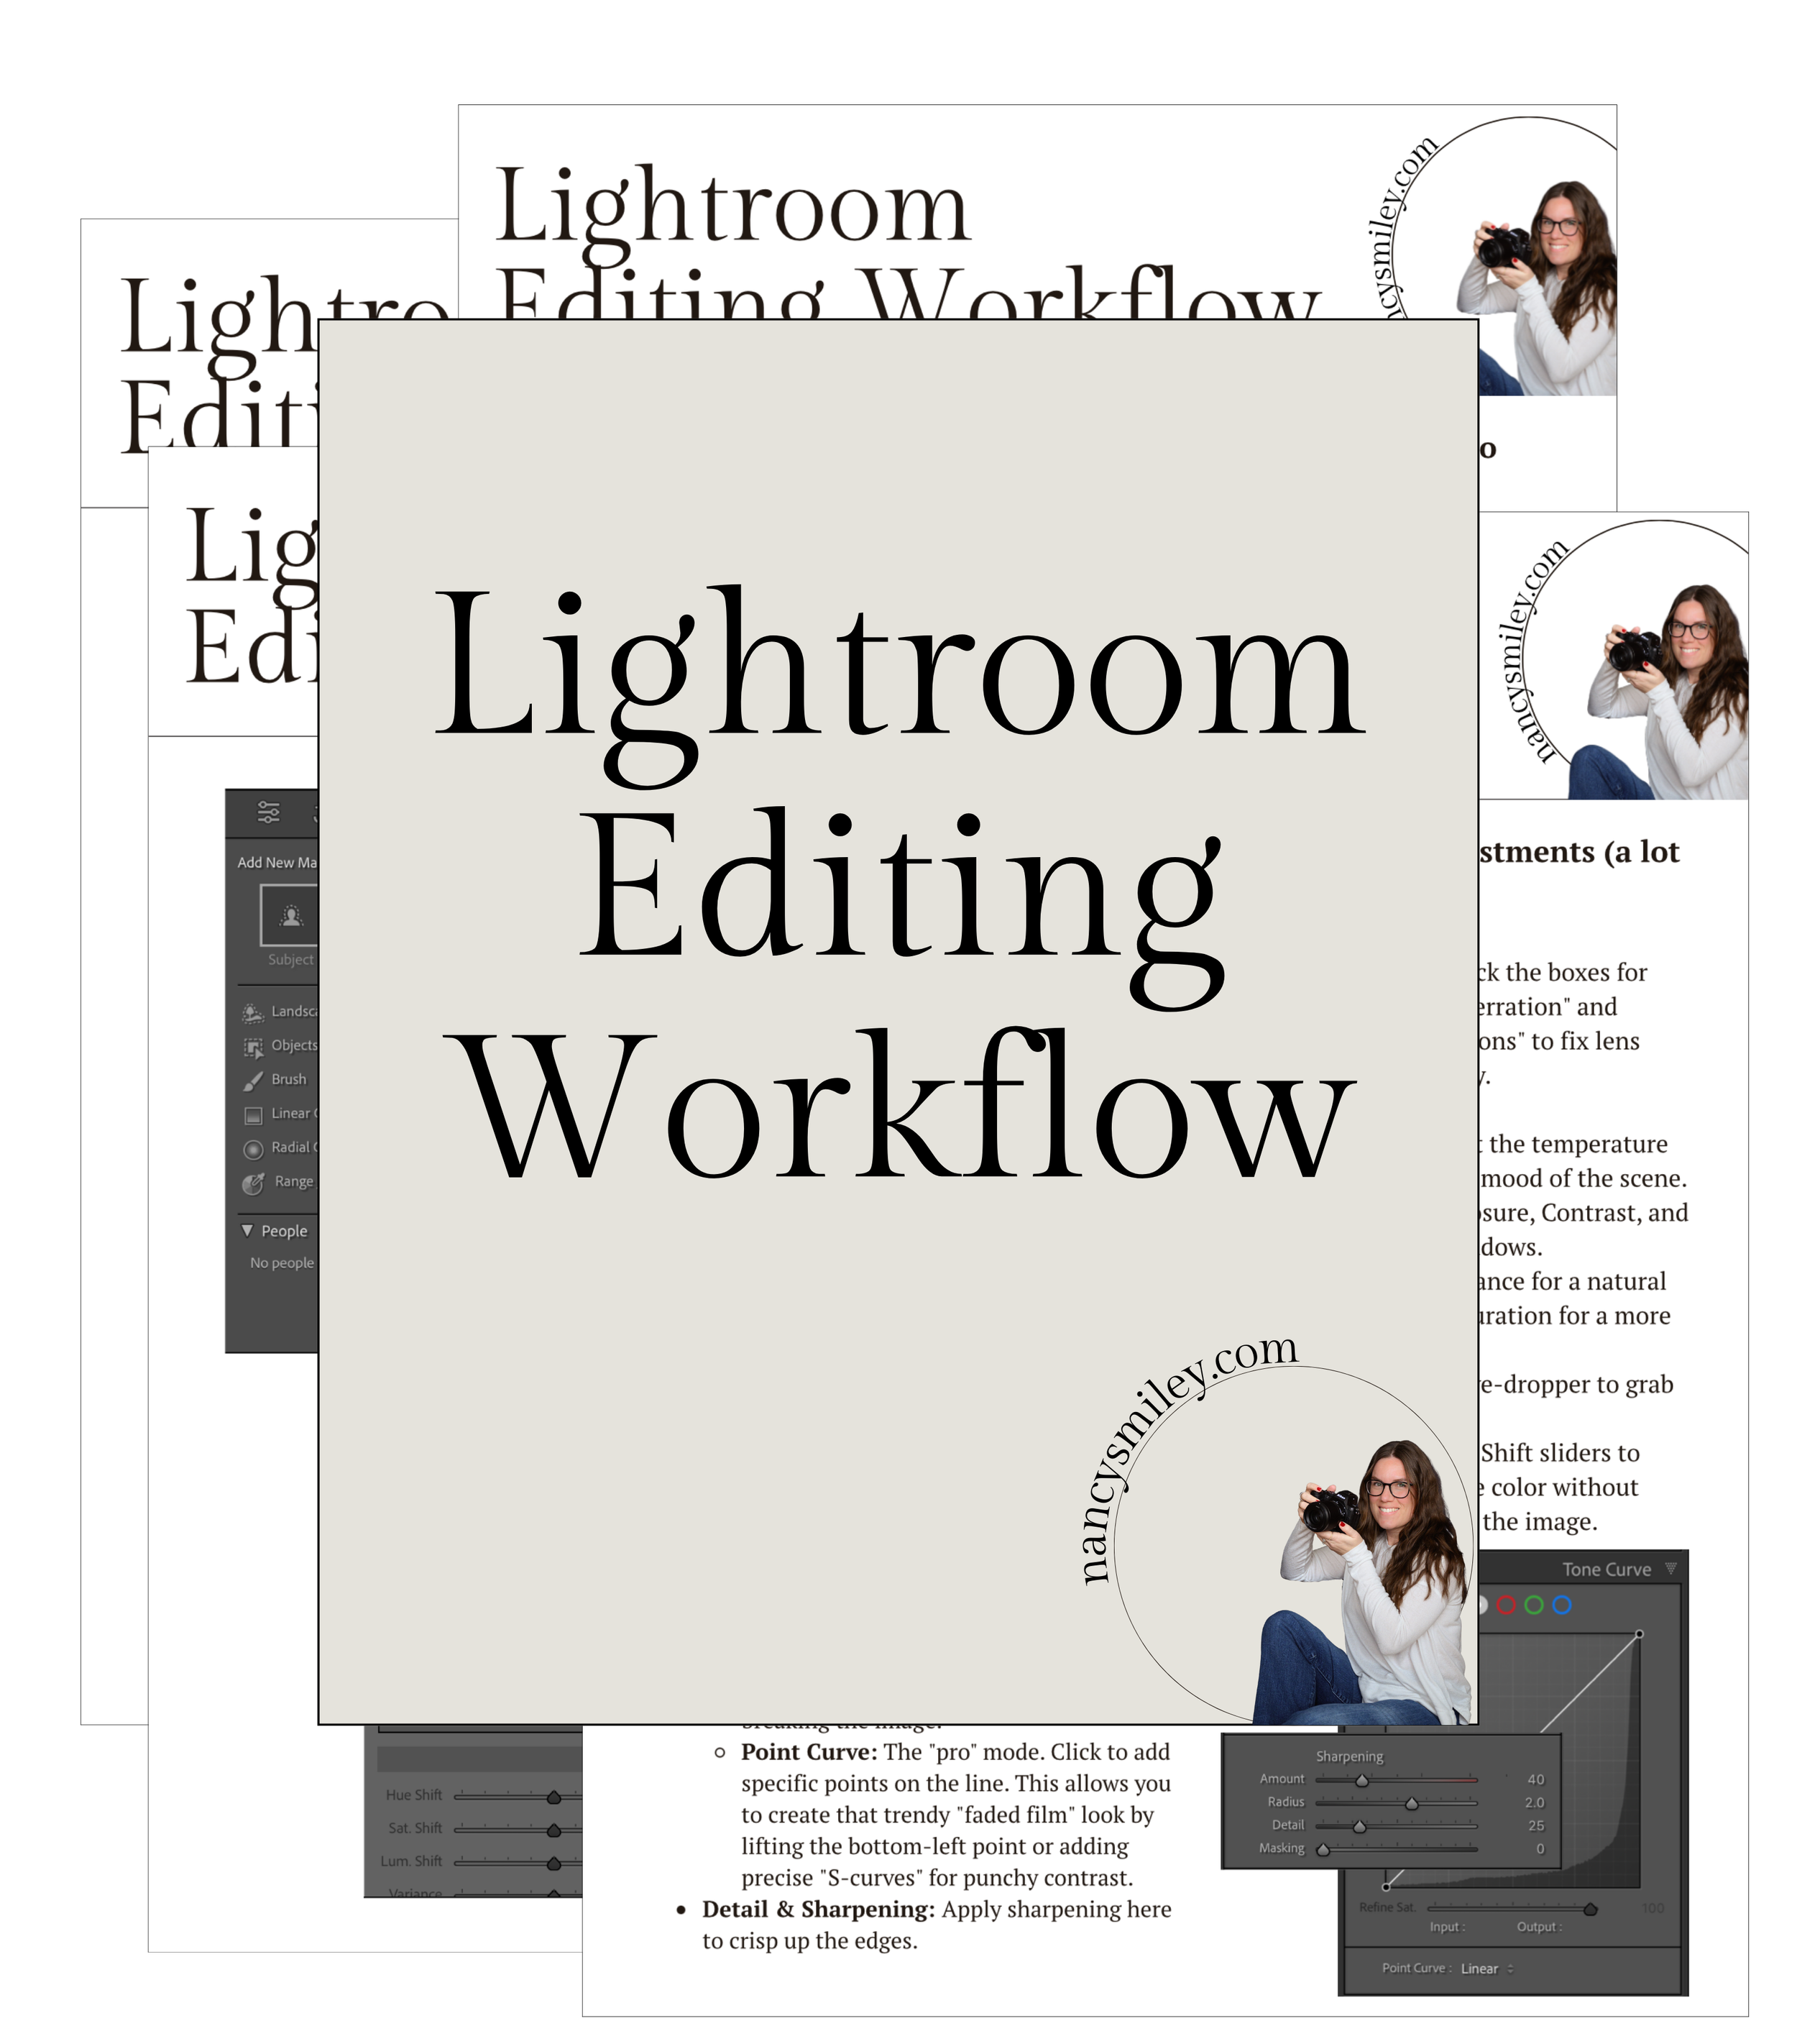
Ready to Master Your Entire Lightroom Setup?
Shortcuts are amazing for speed, but having a solid, repeatable system is what truly changes the game!
If you're tired of guessing with sliders and want to build a bulletproof catalog system that stays organized no matter how many shoots you do, come hang out in The Lightroom Series. I walk you step-by-step through:
Creating a clean, stress-free Folders & Catalog System so you never lose an image file again.
Mastering tone curves, intentional color grading, and clean editing techniques.
Pro-level local masking, retouching, and quick culling frameworks.
💡 Explore The Lightroom Series right here!

Need More Lightroom Tips? I've Got You Covered!
Stick around and check out these helpful guides to keep building your Lightroom confidence:
Avoid These 9 Deadly Editing Mistakes
10 Lightroom Mistakes That Are Holding Back Your Photography
The Simple 4-Step Method to Perfect White Balance in Lightroom
How to Create Lightroom Presets
My 6 Favorite Lightroom Tricks
Which Lightroom is Actually for You? Cloud vs. Classic (or compare Lightroom CC vs. Classic)
Search the blog for more helpful info! 👇
Needing to dive deeper? Check out…
The Camera Series— for mastering your gear.
The Lightroom Series— for editing.
AI-Powered Hail Mary Masks— for lightning fast, unmatched editing tools.
The Camera Series— for comprehensive, affordable trainings designed for beginner or intermediate photographers.
Nancy’s Recommended Gear— and where she buys it used (reputable with warranties!)