How to Fix Flat Lighting in Lightroom: A Step-by-Step Masking Guide
Have you ever brought a photo into Lightroom, looked at it, and felt a tiny wave of disappointment? The subject is great, the focus is sharp, but the light is just... meh. It’s flat, dull, and completely lacks that magical depth that makes an image pop off the screen.
We’ve all been there! Flat lighting happens to the best of us because nature doesn't always deliver dramatic, golden-hour directional light when we're out with our cameras. Think about these super common shooting scenarios:
The Overcast Mountain: Mountains give a gorgeous backdrop, but a thick layer of cloud cover acts like a massive softbox. The peaks, sky, and foreground valley all blend together into one uniform, low-contrast gray tone with zero dimension.
The Shaded Forest: You’re shooting under a thick trees. While you avoided harsh direct sun spots, the ambient green shade leaves your subject and the trees looking muddy, flat, and washed out, with no clear direction of light.
The Open-Shade Portrait: You played it safe and moved your client under a large covered porch or the shadow of a building. The exposure is even, but their features lack pop, and there's no separation between them and the dark background behind them.
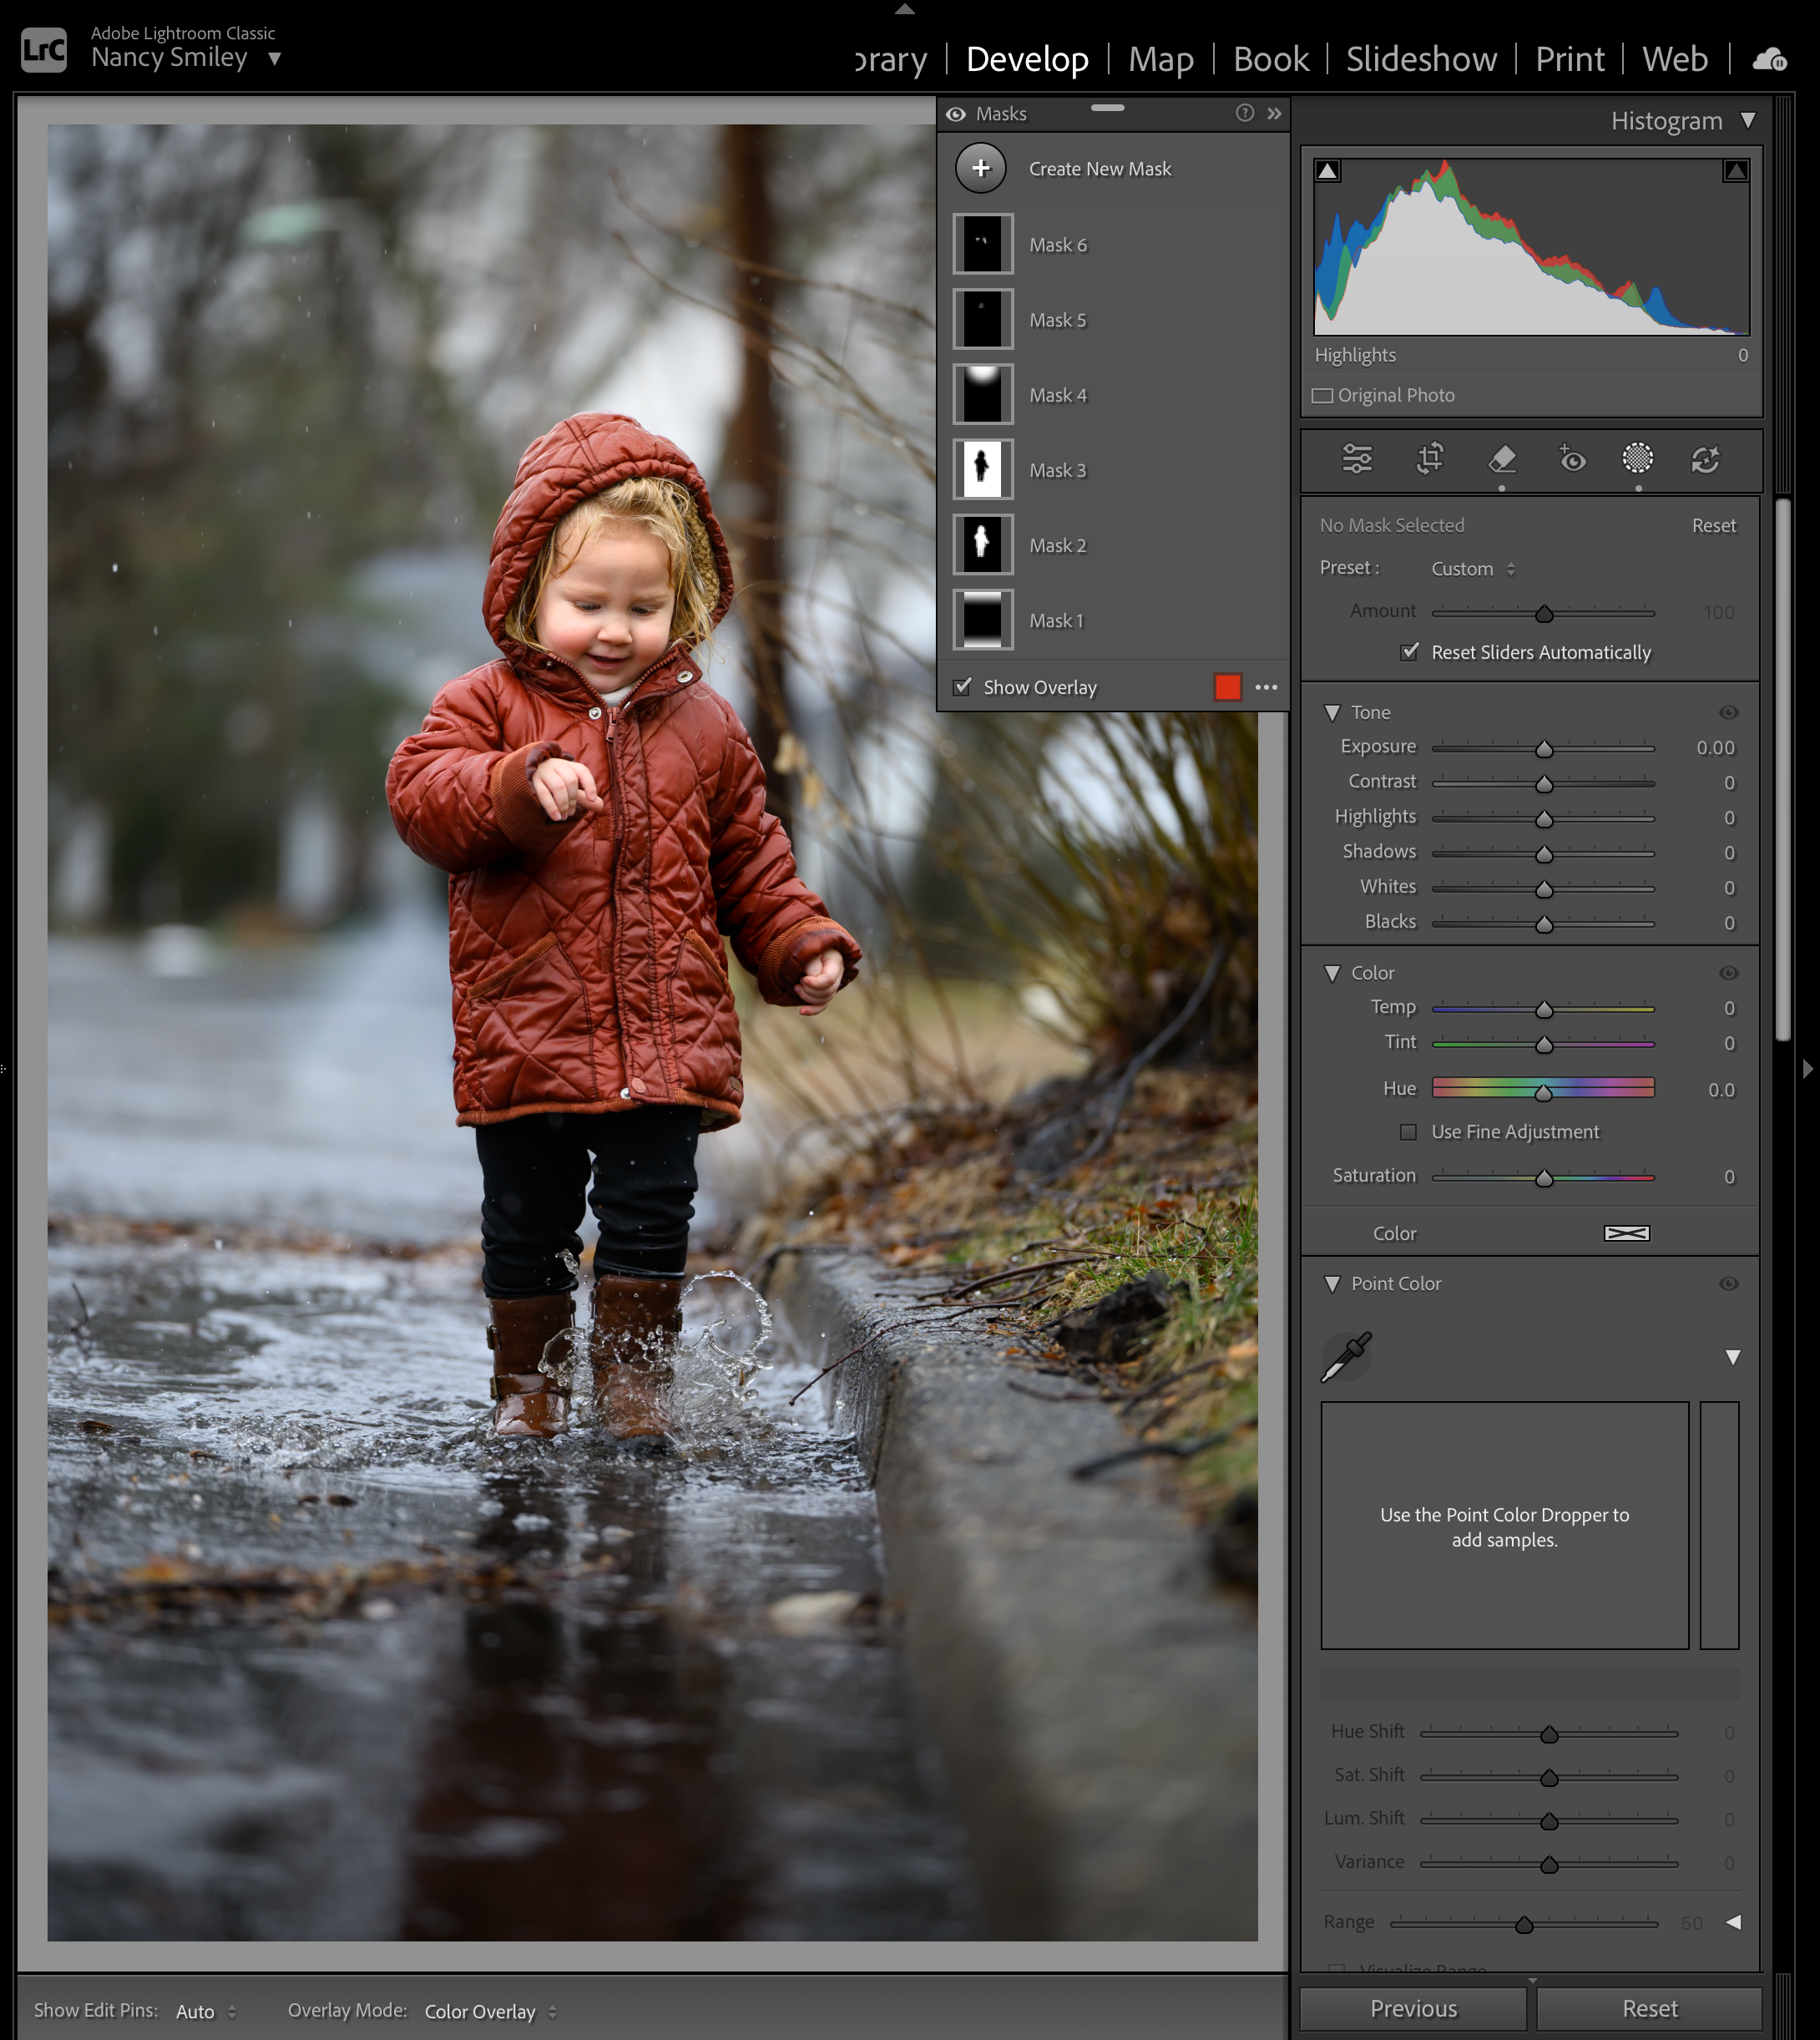
Don't delete those photos just yet! I'm here to save the day! You don't need fancy studio lights or a lucky break in the clouds to build dimension—you just need a solid game plan with Lightroom Masking.
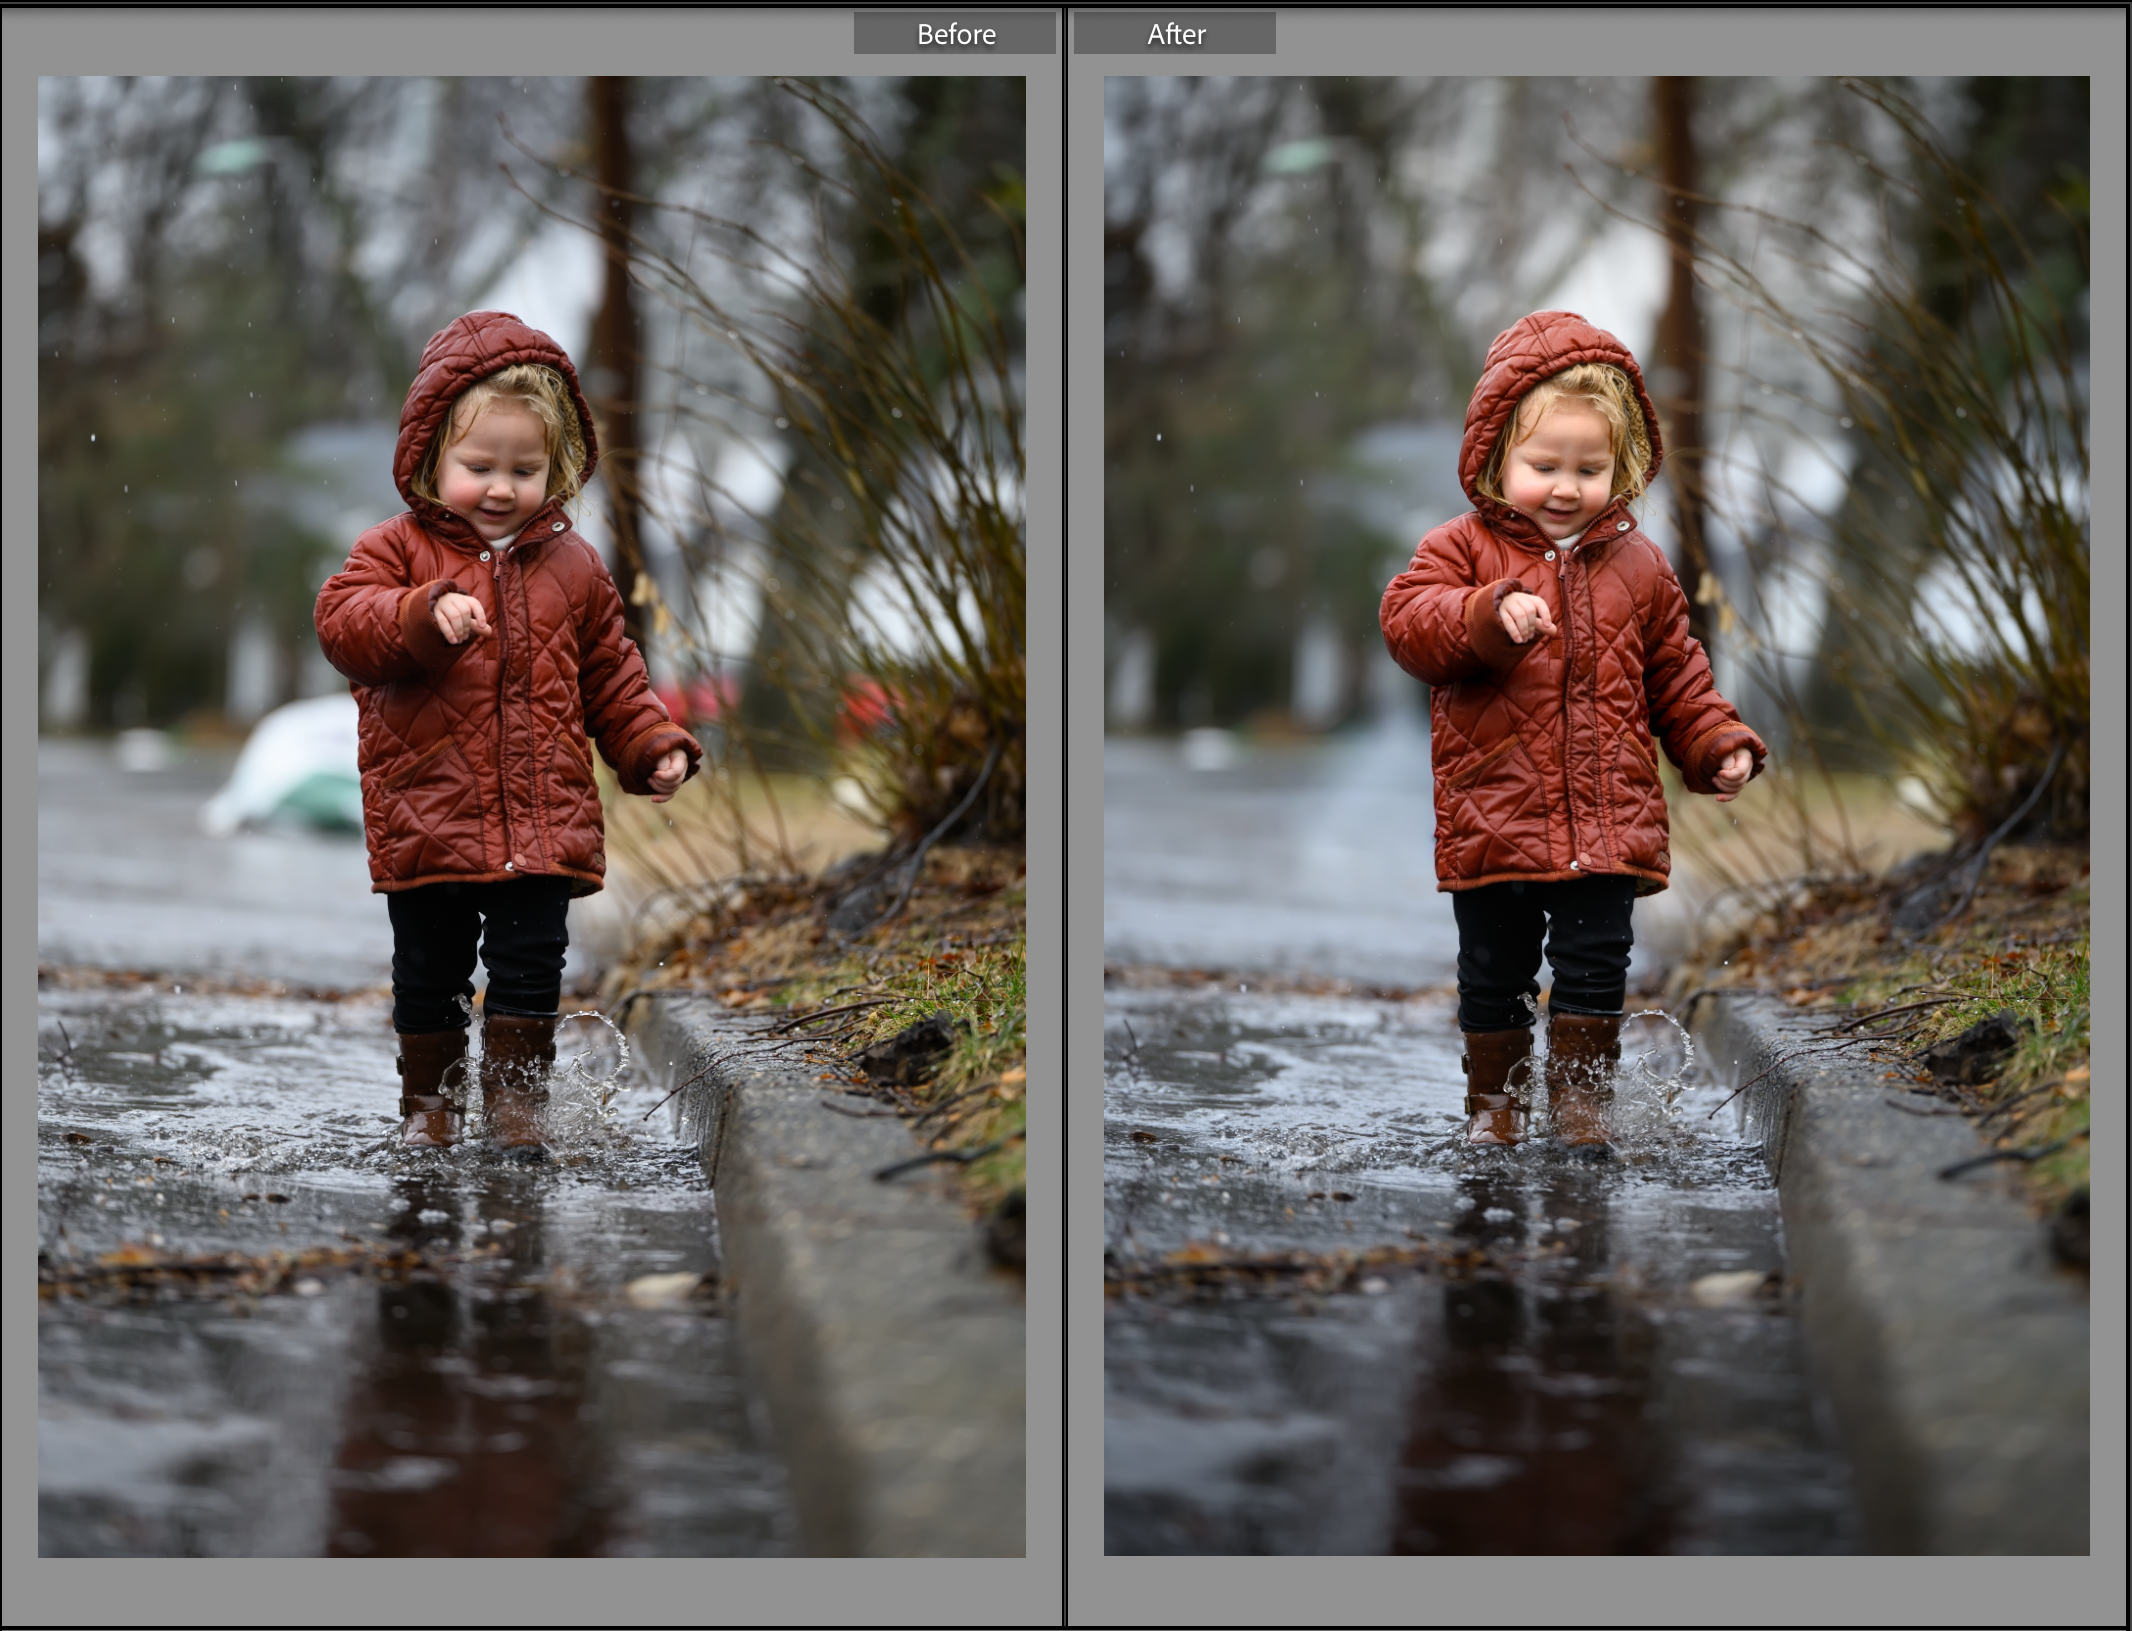
Today, we’re walking through a complete, start-to-finish editing workflow to transform a flatly-lit image into a dimensional, high-end masterpiece. I’ll show you exactly which masks to pick, which sliders to pull, and why every tweak matters so you can rescue your overcast and shaded shots every single time.
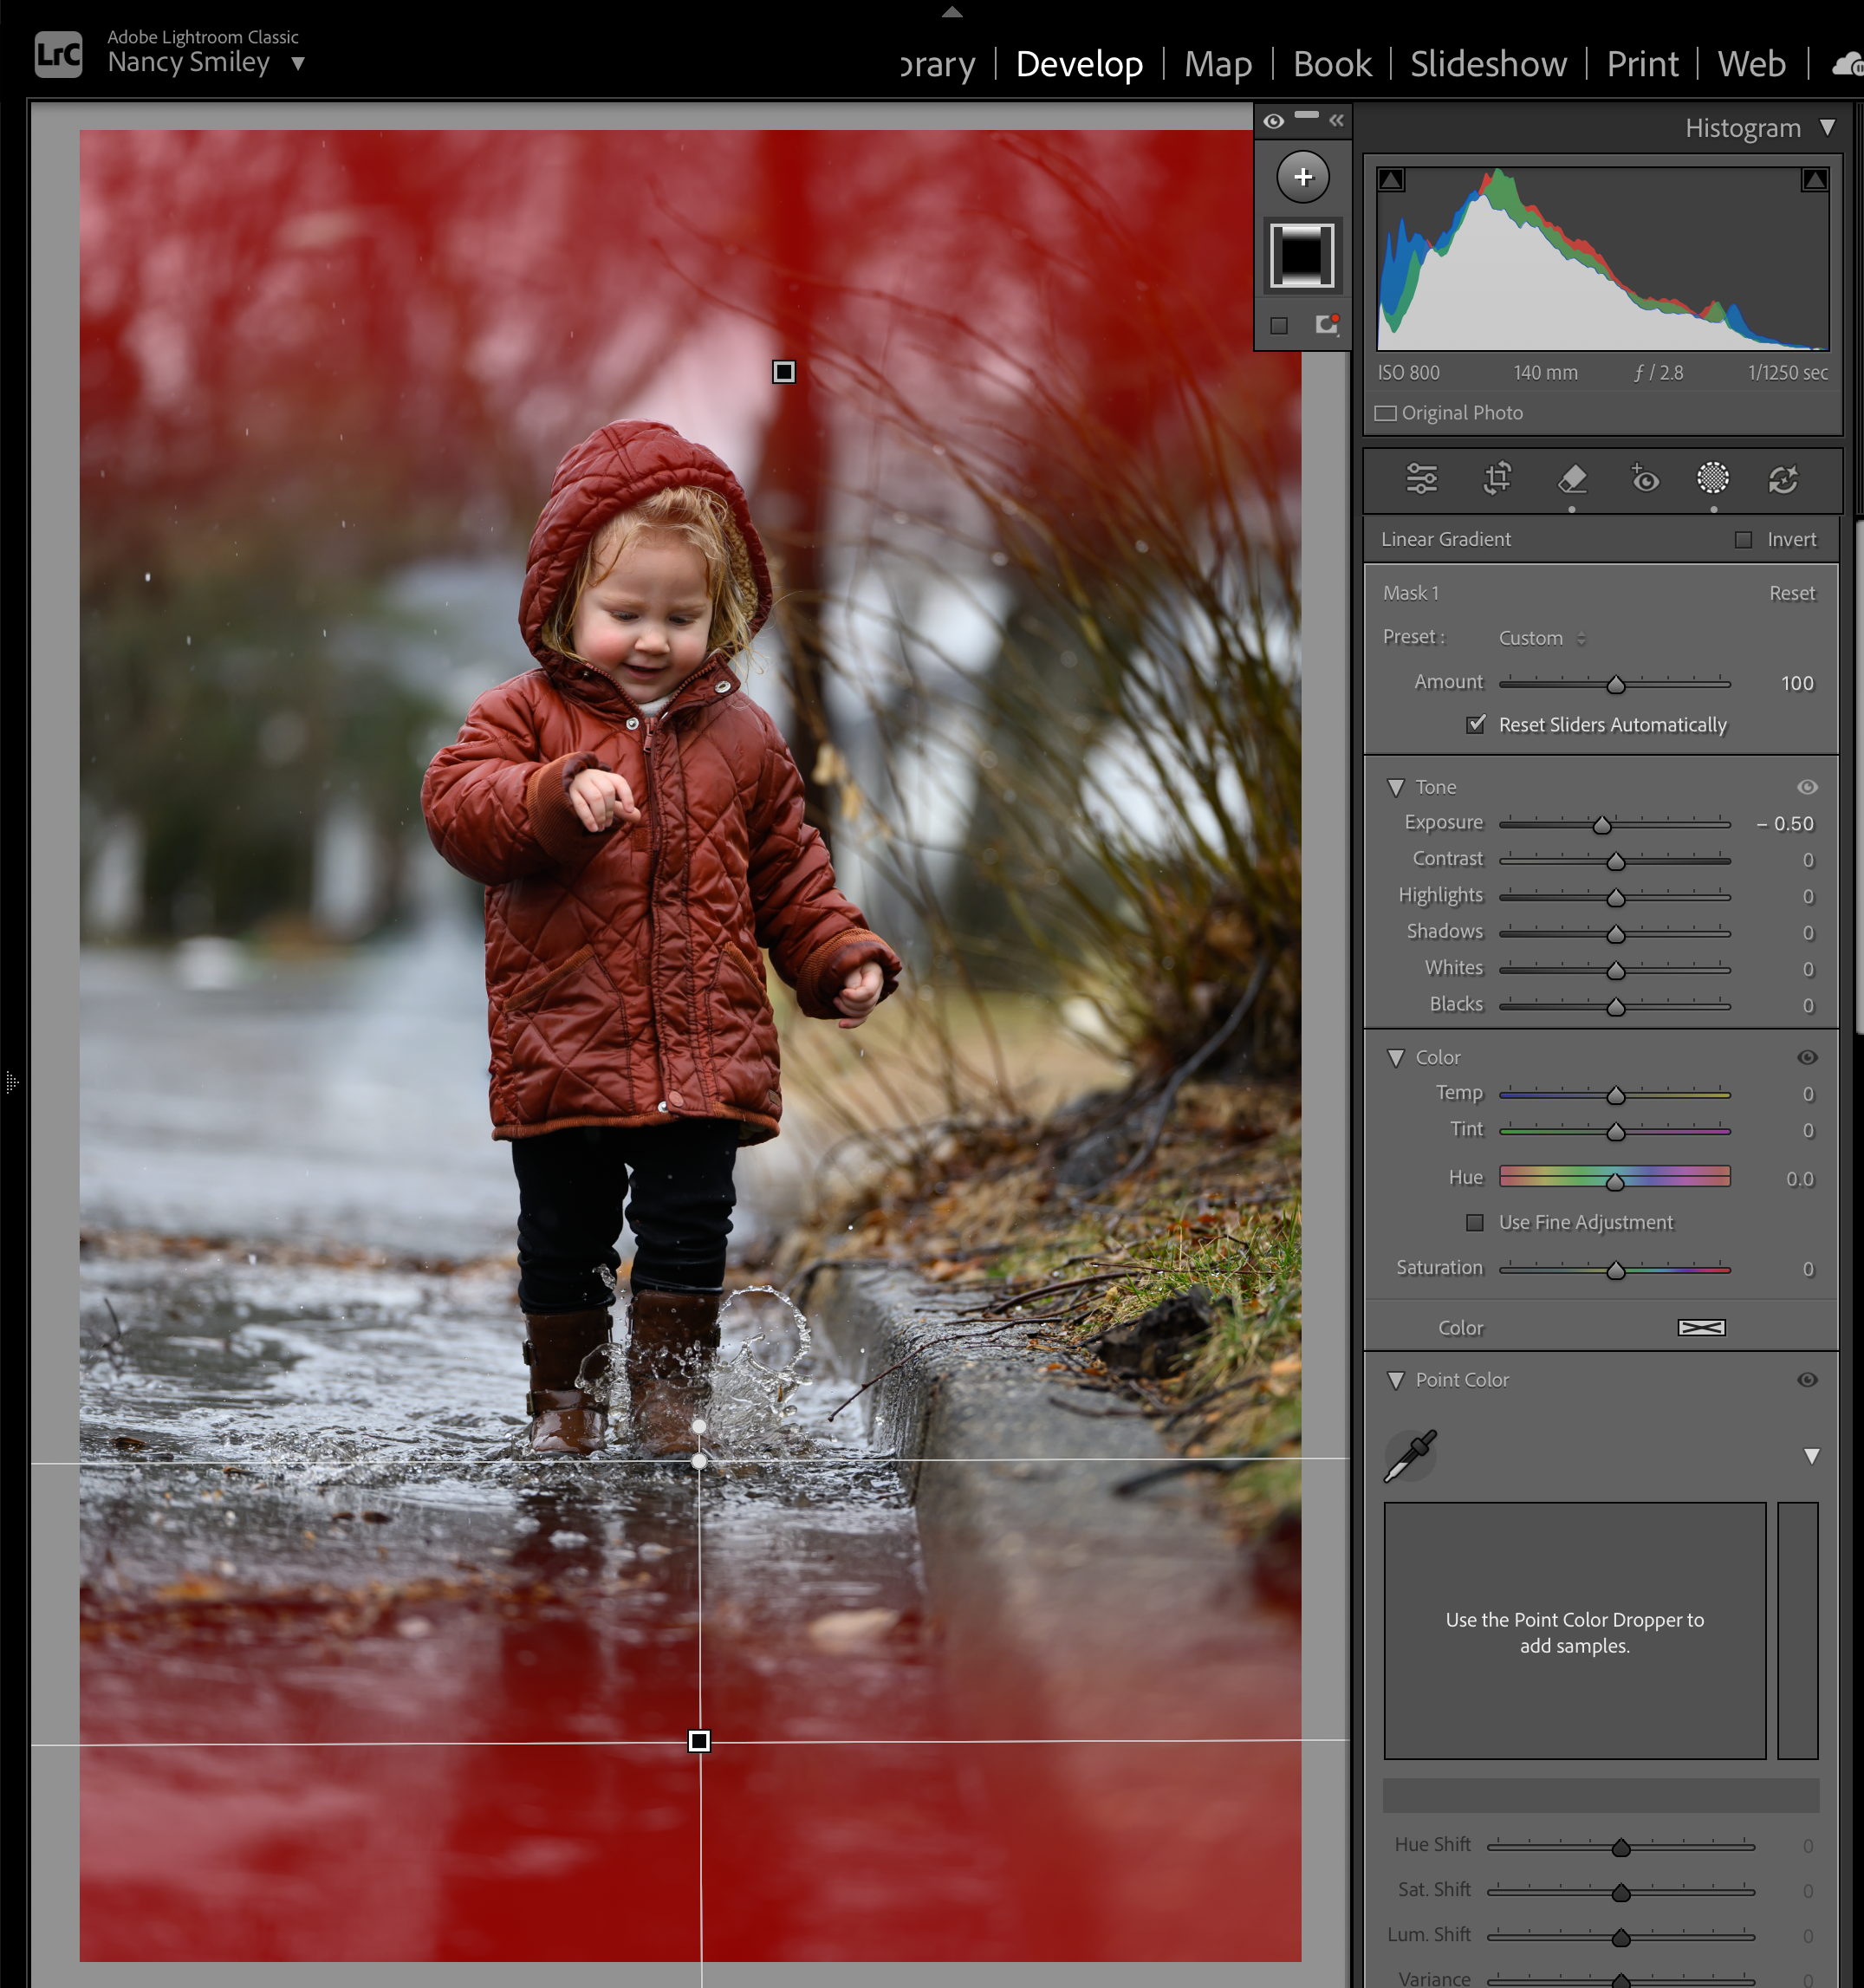
Step 1: Draw the Eye with a Linear Gradient
When light is flat, your viewer’s eye doesn't know where to look first because every part of the image has equal brightness. We need to create a natural "vignette" or light direction to guide the eye toward the center.
The Mask Choice: Linear Gradient
Why this mask? A Linear Gradient creates a soft, feathered falloff across a straight edge, making it look completely natural—like falloff light from a tree canopy or dramatic sky.
The Sliders & Why We Move Them:
Bring Down Exposure: Pull a Linear Gradient from the top edge down, and another from the bottom edge up. Lowering the exposure on the edges subtly darkens the foreground and top frame, drawing focus inward.
Decrease Dehaze / Texture: Slightly reducing texture on the very edges softens distractions, keeping the viewer's gaze locked on the subject.
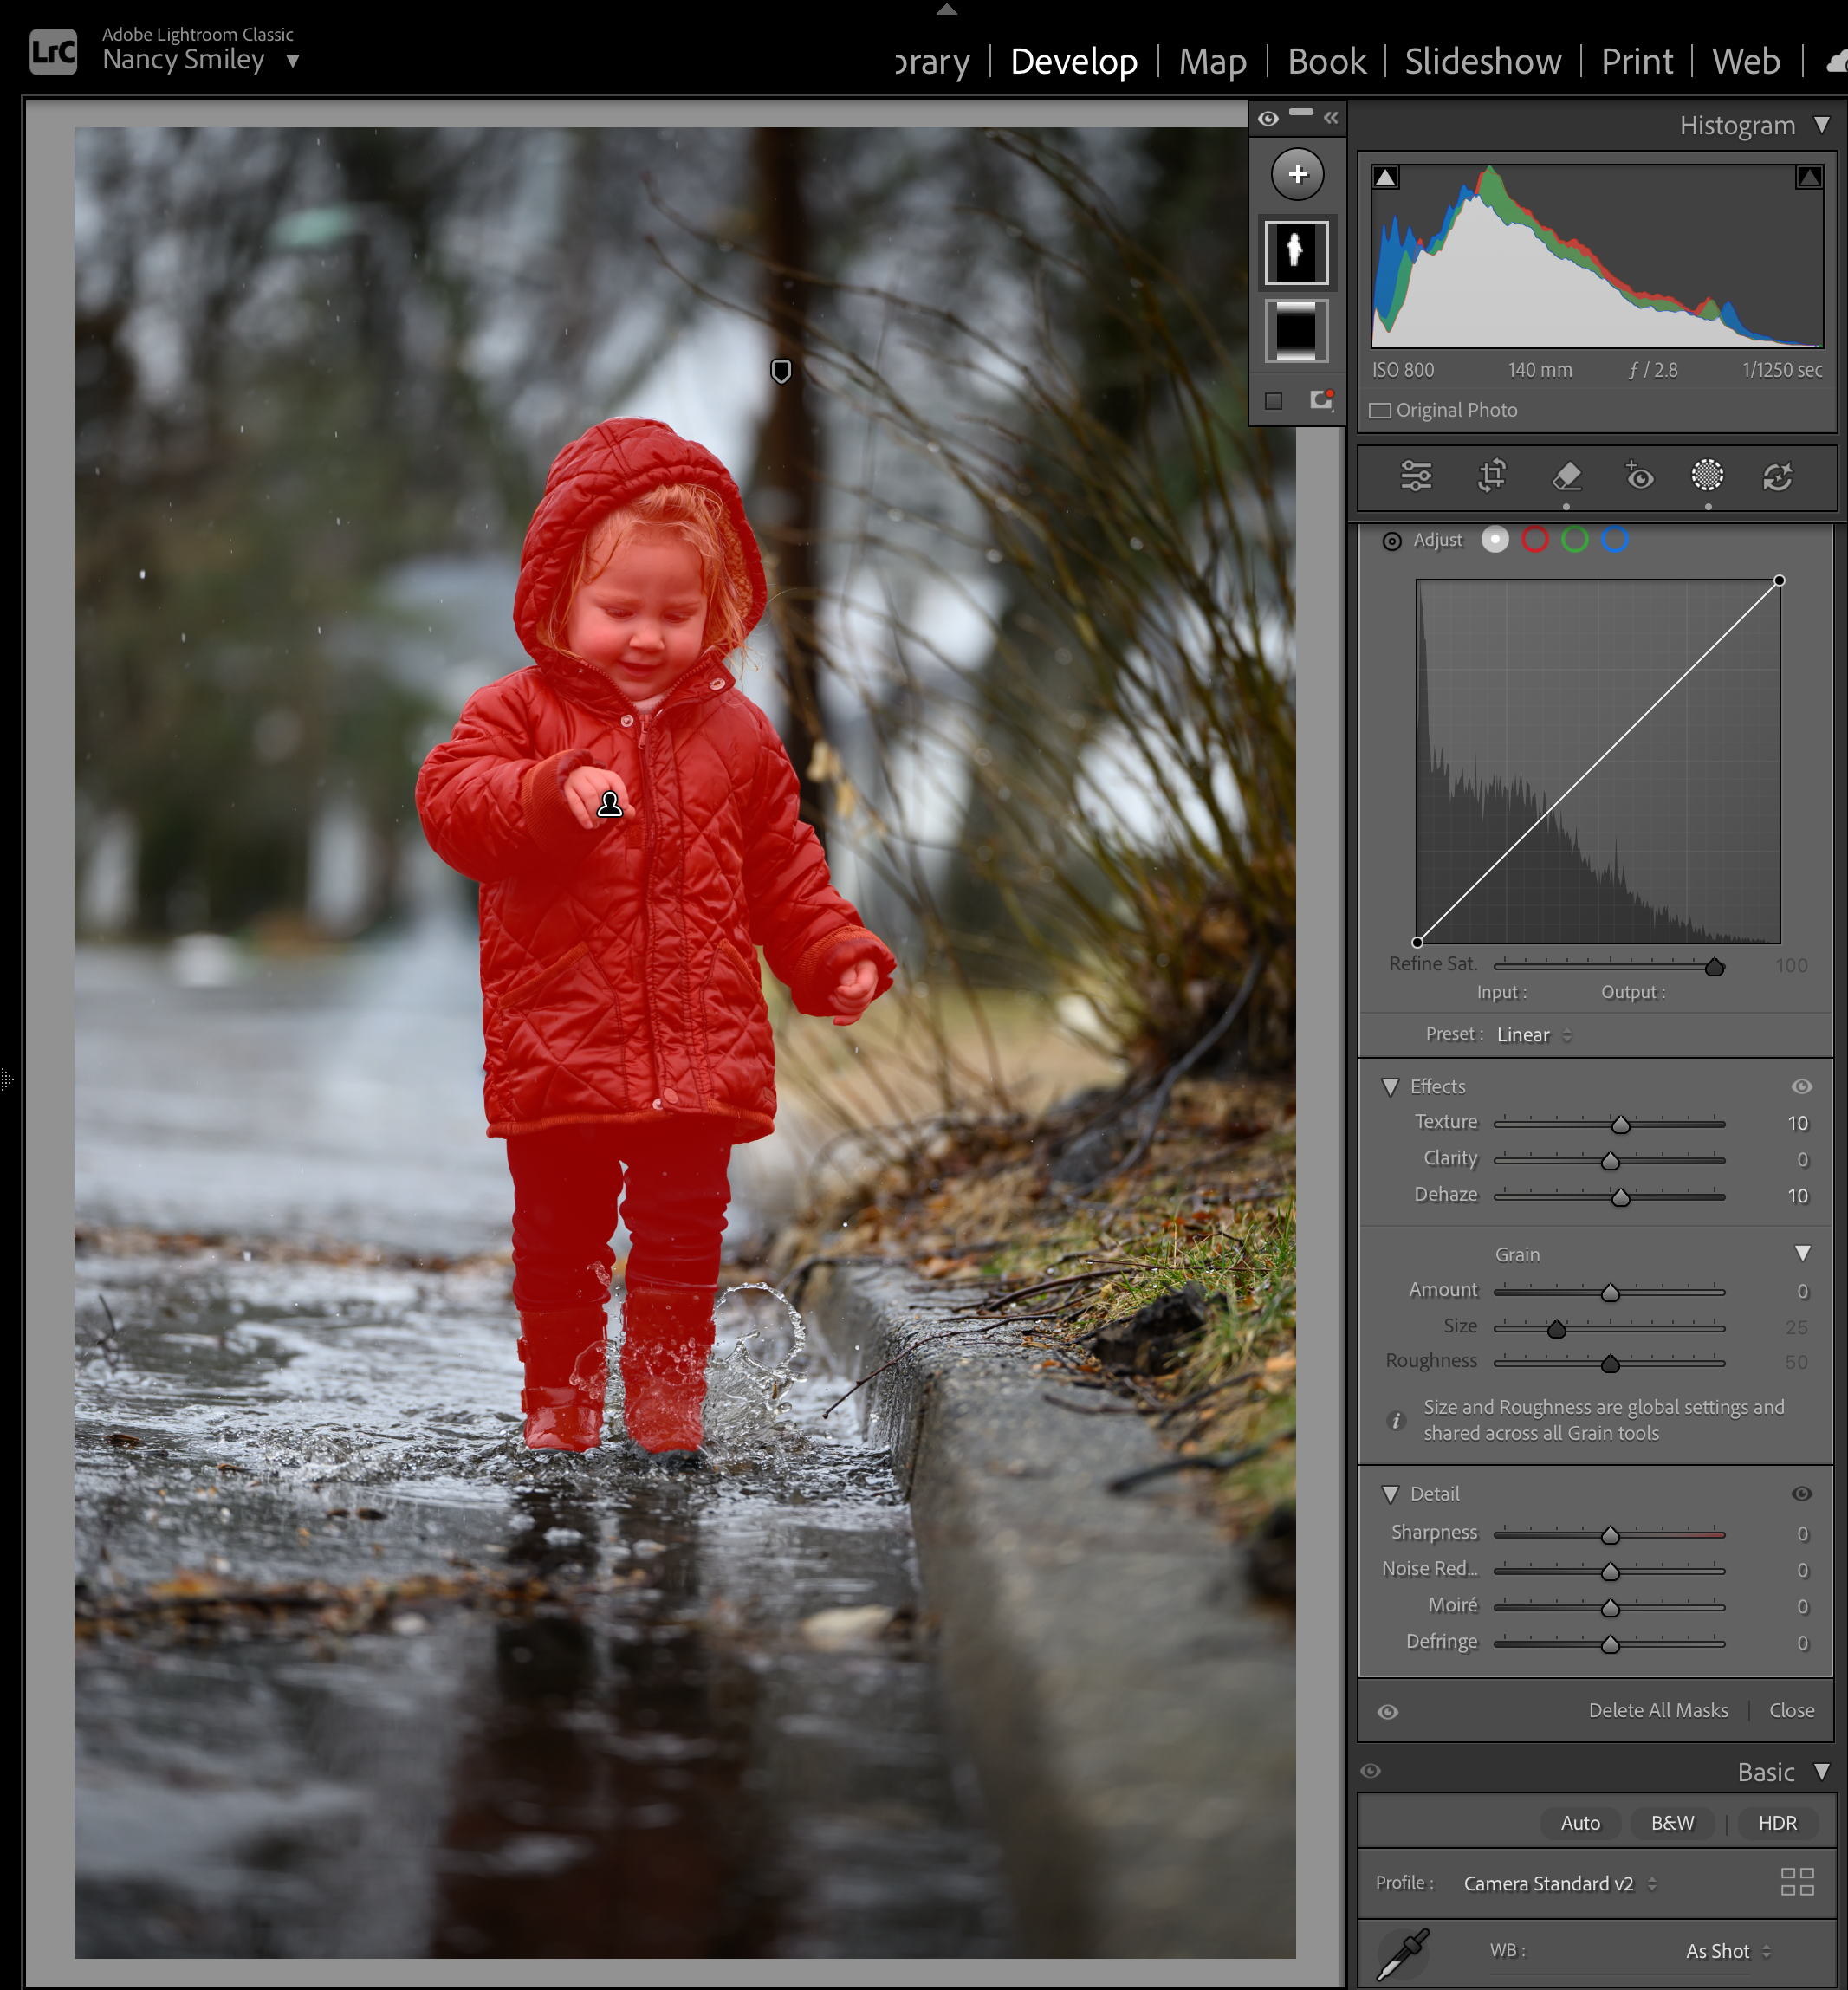
Step 2: Pop Your Subject with "Select Subject" (AI Mask)
Now that the edges are framed, our main subject still feels buried in the flat background tones. We need them to step forward visually.
The Mask Choice: Select Subject (AI)
Why this mask? Instead of spending 10 minutes hand-brushing around hair and clothing, Lightroom’s AI isolates your focal point in one click with extreme precision.
The Sliders & Why We Move Them:
Increase Exposure: Give your subject a tiny bump in light so they appear illuminated relative to the background.
Increase Shadows: Flat lighting often leaves muddy, gray shadows in hair or clothing. Lifting the shadows brings back clean detail without blowing out highlights.
Add Clarity & Texture: Adding a touch of clarity directly to the subject makes them look crisp and three-dimensional, while leaving the background soft.
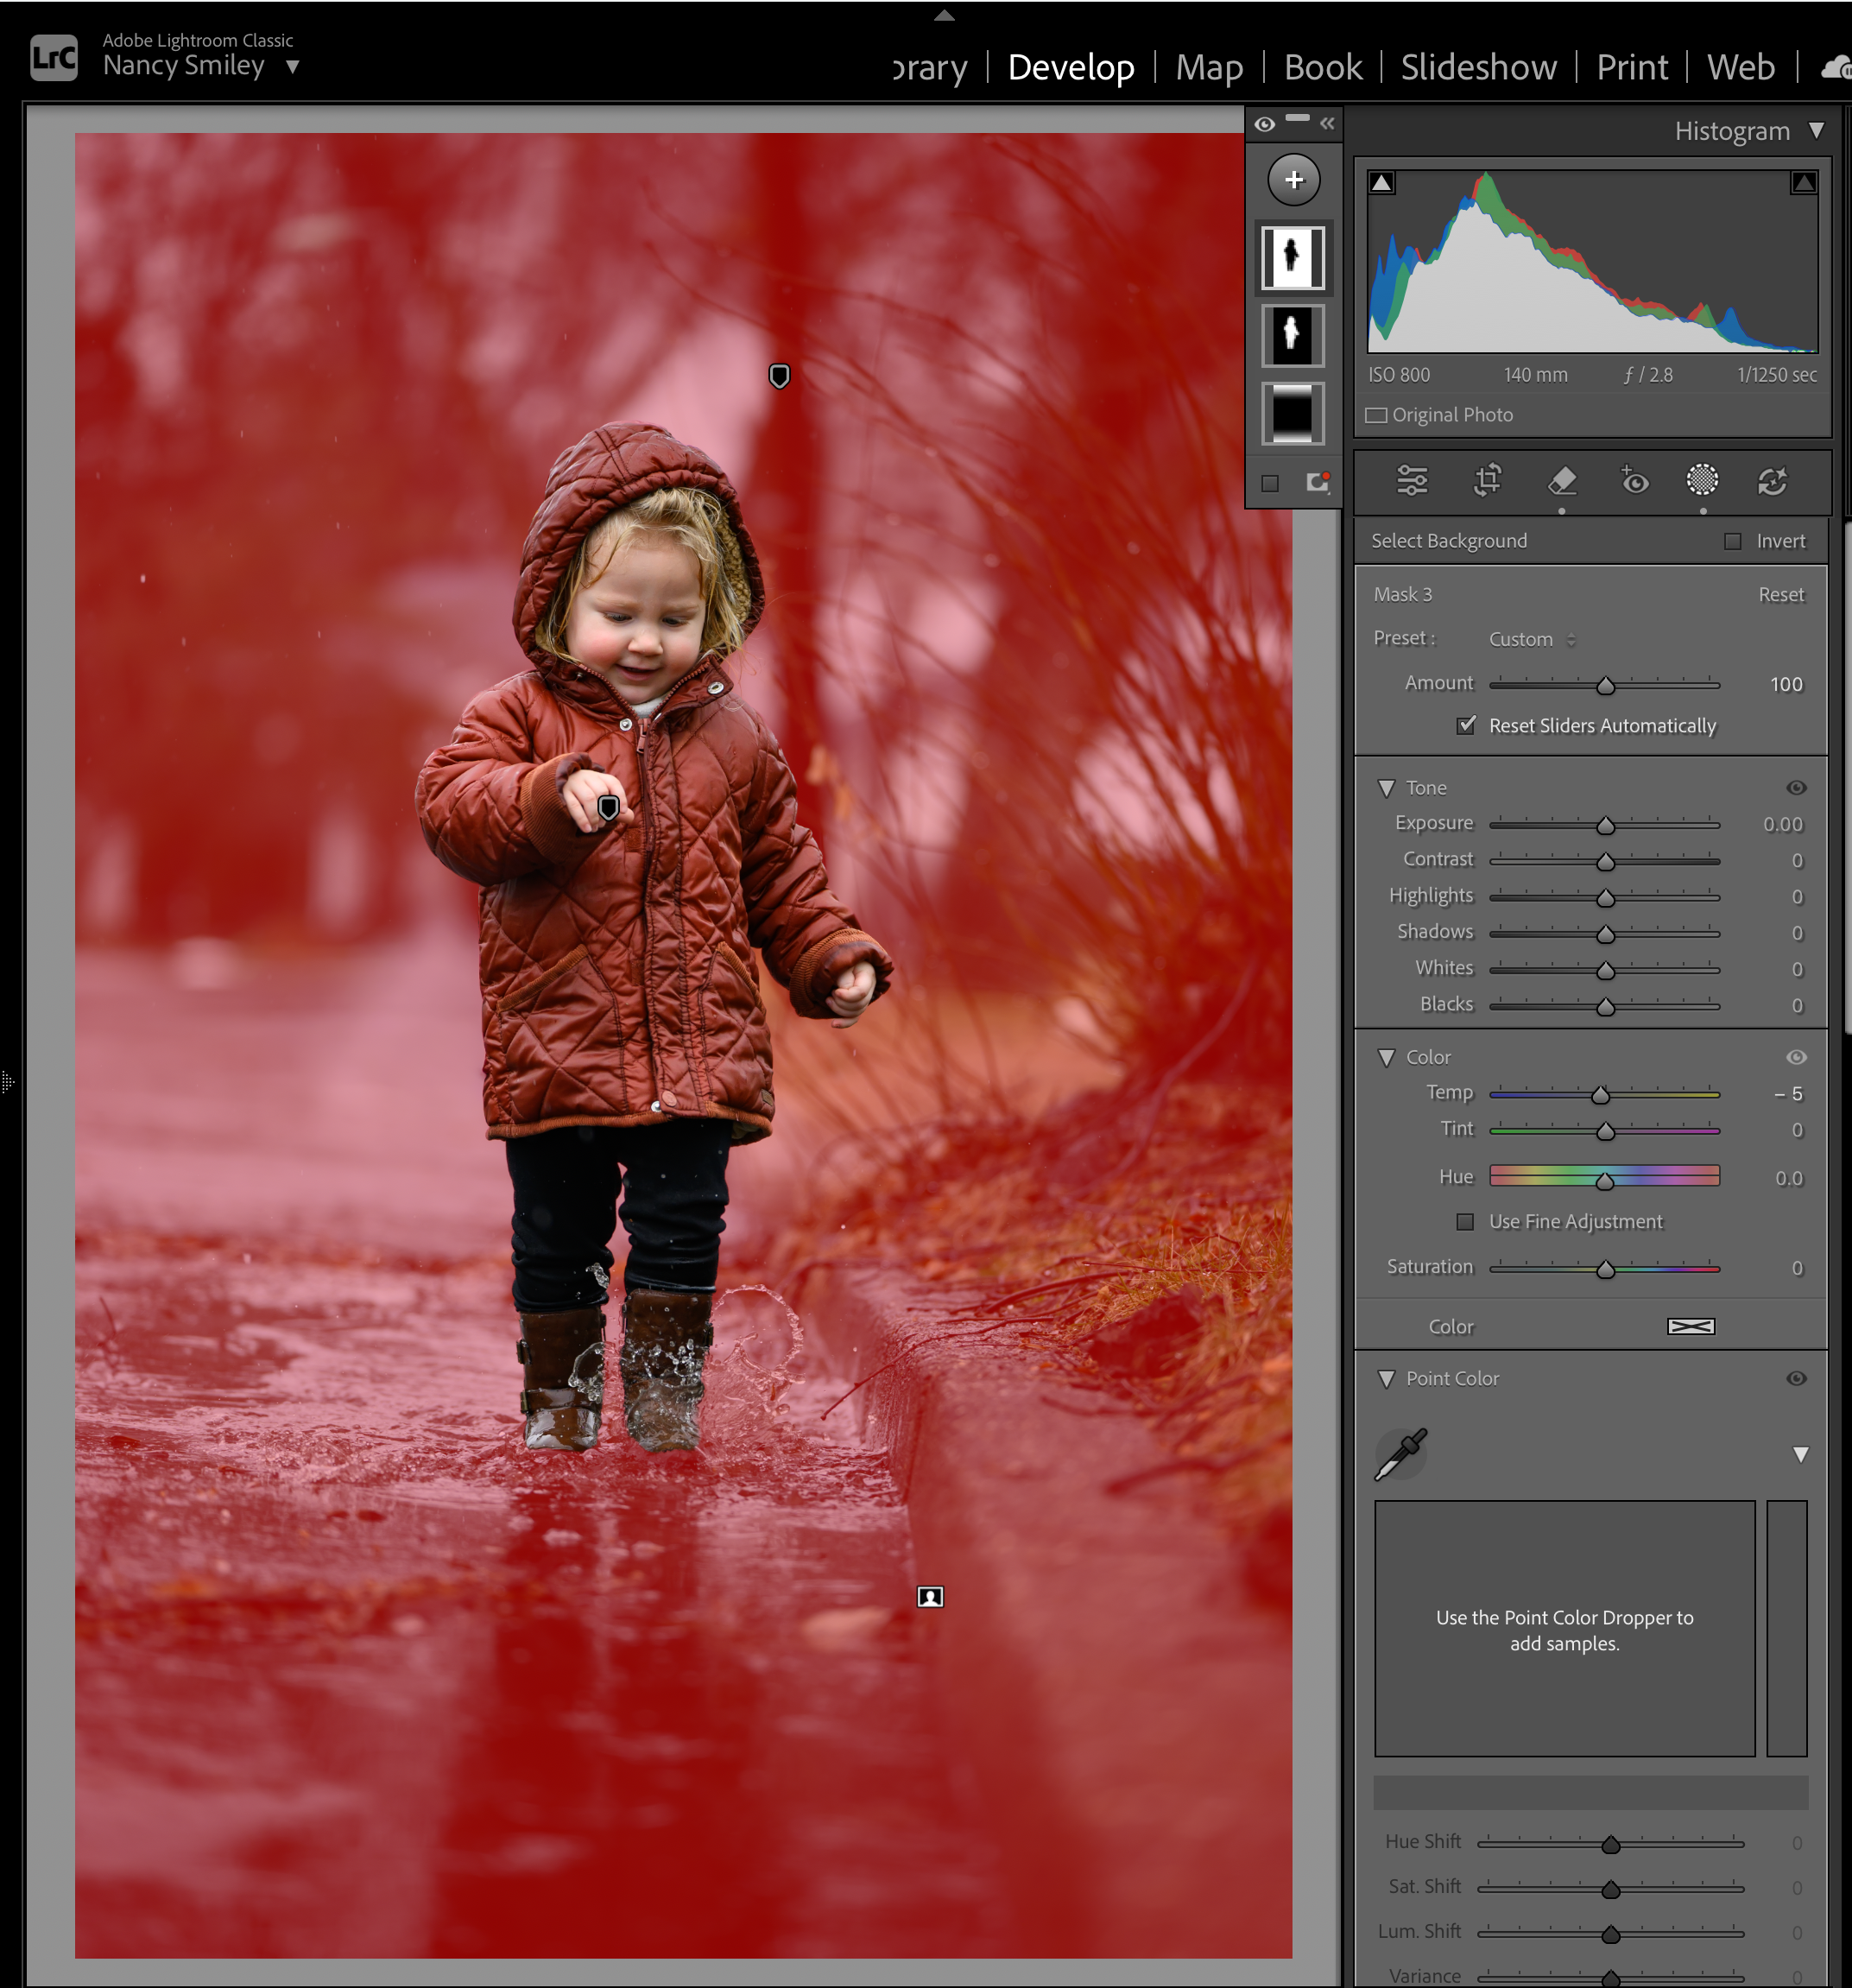
Step 3: Create Background Separation with "Select Background" (AI)
To make a flat photo feel like it was shot on a wide-aperture lens with dreamy depth, we need to push the background away from our subject.
The Mask Choice: Select Background (AI)
Why this mask? It automatically selects everything except your subject. It’s the ultimate contrast tool for creating instant atmosphere.
The Sliders & Why We Move Them:
Decrease Texture & Clarity: Softening the background texture creates a subtle, faux-bokeh effect that mimics expensive lenses and dreamy natural light.
Decrease Sharpness: Reducing background sharpness keeps the viewer’s focus on the sharp detail of your subject.
Bring Down Temperature: Warm tones move toward the eye, while cool tones recede into the distance. Cooling down a flat background slightly makes your warm subject pop right off the screen!
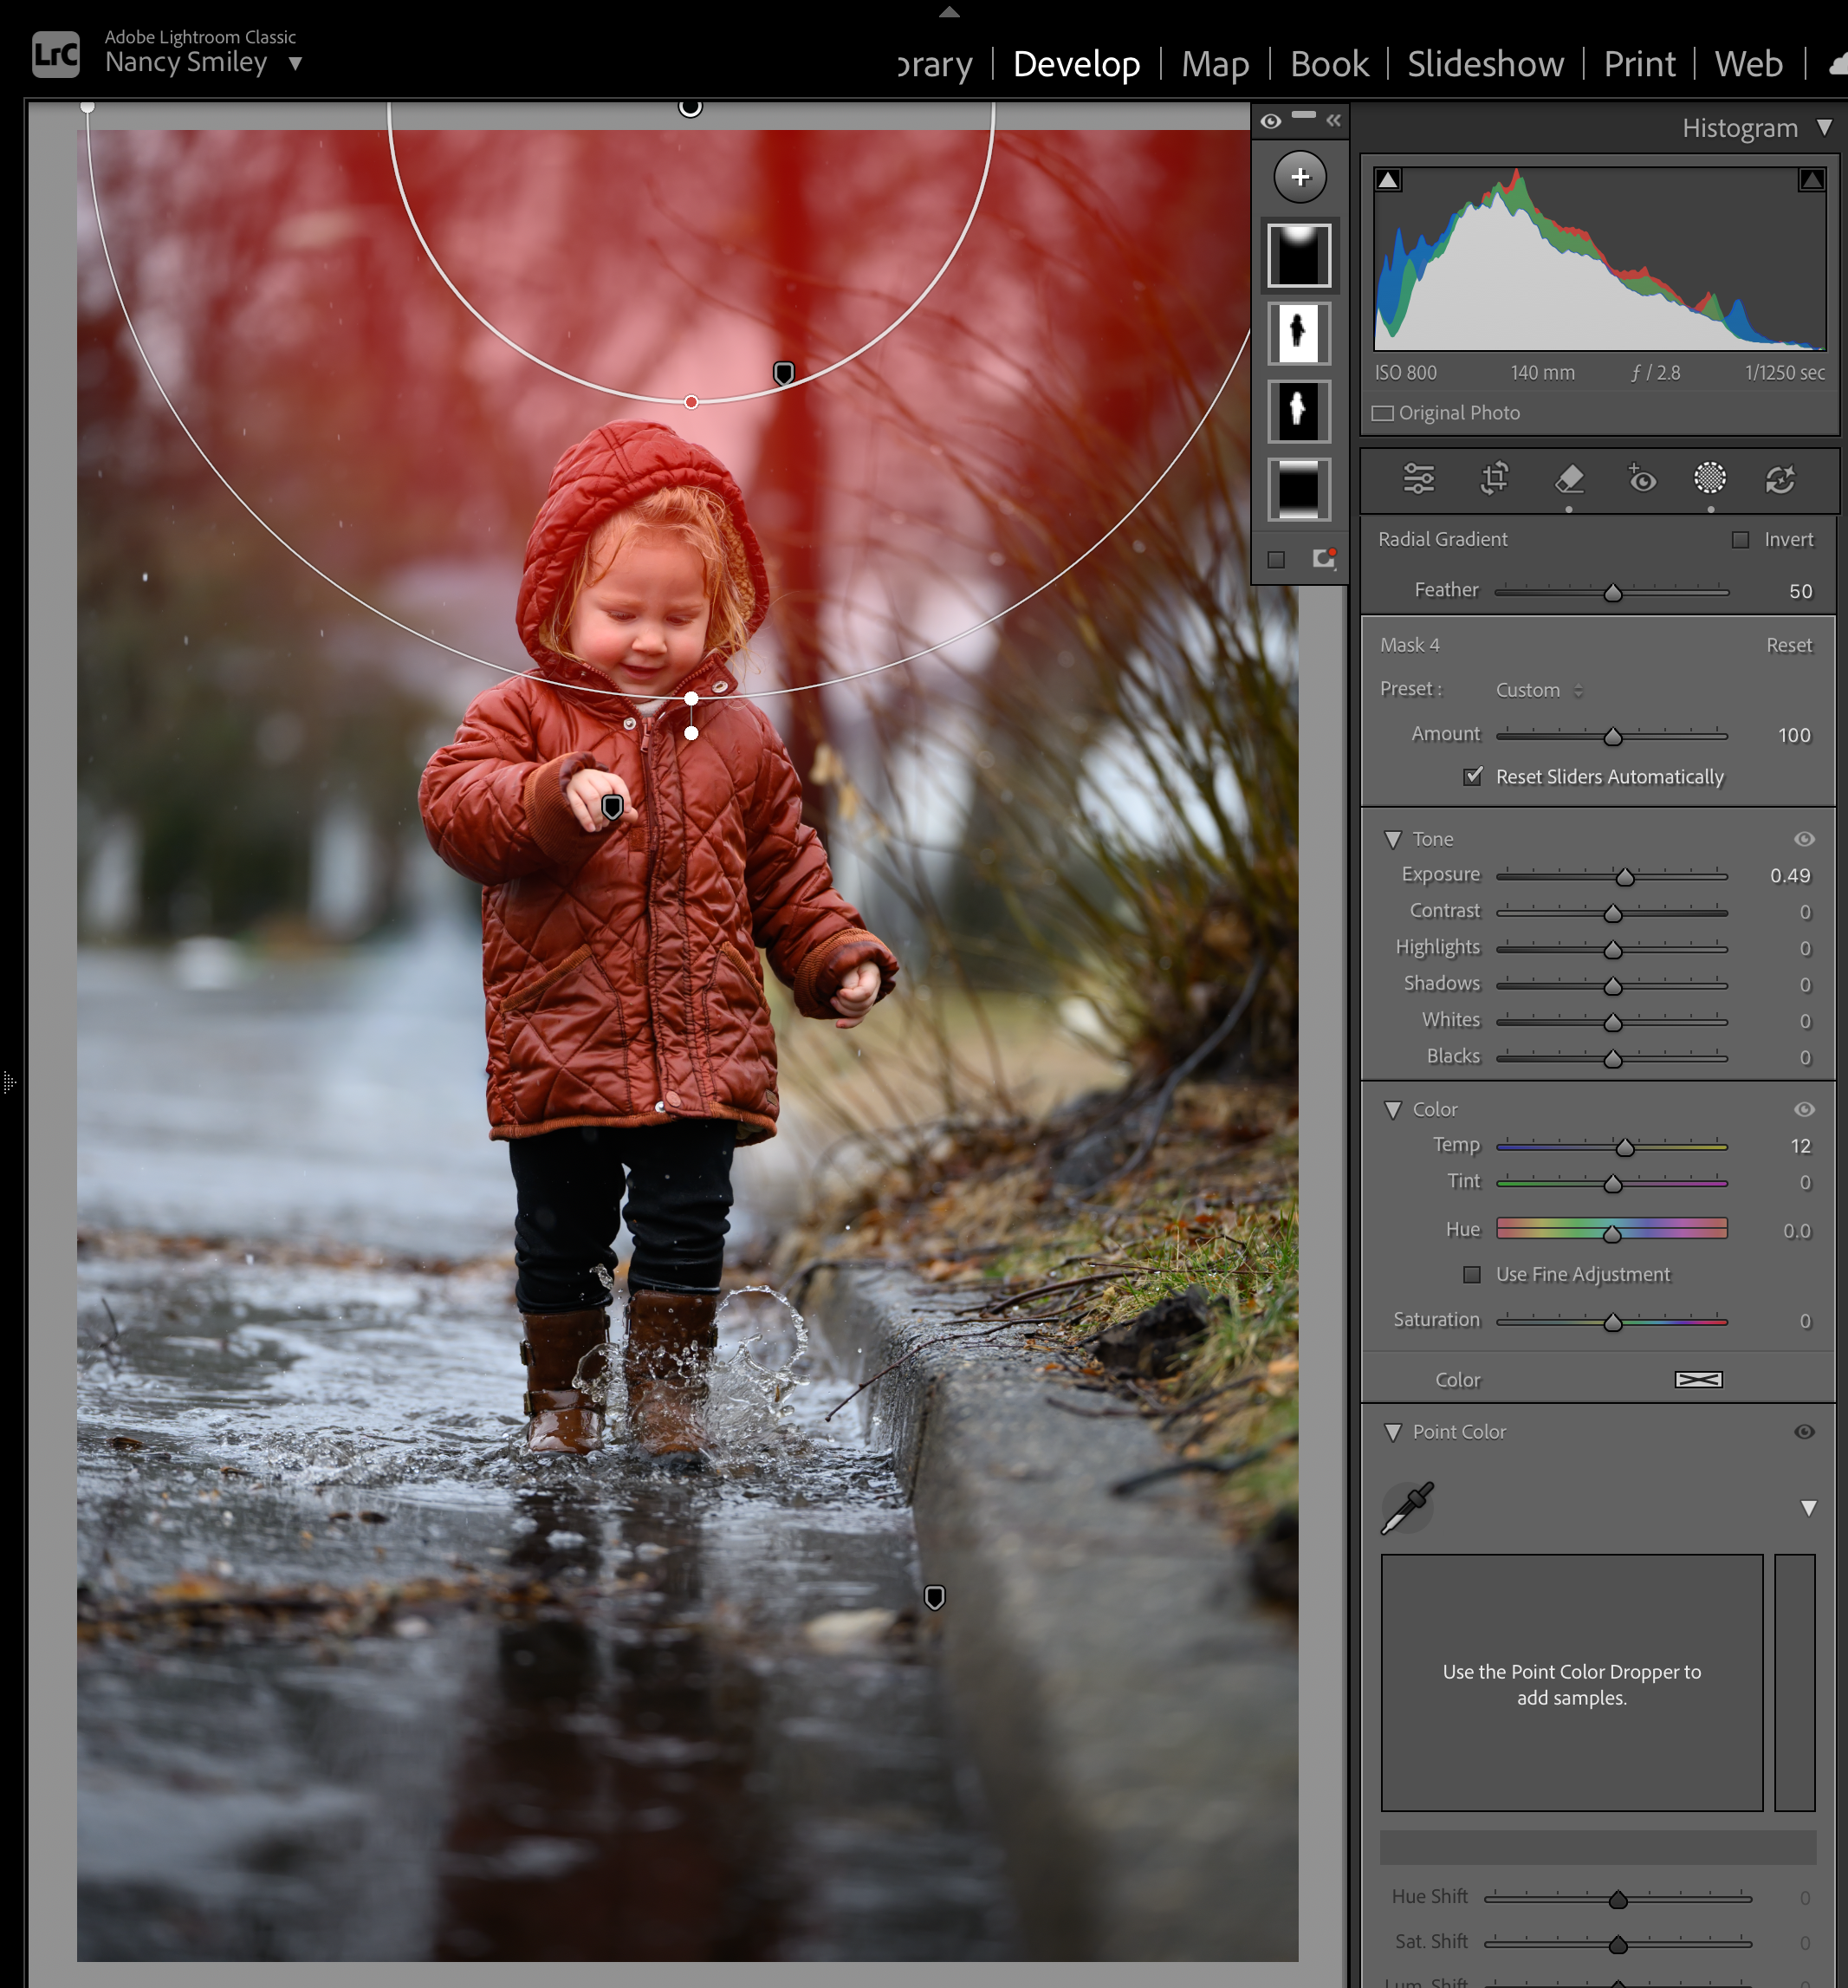
Step 4: Add Directional Light with a Radial Gradient
Flat cloudy days lack a clear sun source. We can easily sculpt our own natural-looking light source coming in from one side of the frame!
The Mask Choice: Radial Gradient
Why this mask? Its circular, feathered shape mimics a soft pool or burst of light entering the scene.
The Sliders & Why We Move Them:
Position: Place a large oval Radial Gradient in one upper corner of your photo, dragging it slightly over your subject’s shoulder or hair.
Lift Exposure: Brightens that corner to simulate directional light filtering through trees or clouds.
Increase Temperature: Adding warmth to this burst simulates golden hour sunlight entering the frame.
Dehaze: Dropping Dehaze slightly creates that soft, dreamy sun haze that instantly washes away flat lighting!
Step 5: Final Polish with the Adjustment Brush (K)
To finish off the edit, we use a manual brush for tiny, high-impact details.
The Mask Choice: Brush Tool
Why this mask? Perfect for precise, pinpoint edits that AI tools can't guess—like catchlights in eyes or bright spots on clothing.
The Sliders & Why We Move Them:
Paint over the eyes/catchlights: Bump Exposure and Whites to make eyes sparkle and bring life back to flat facial lighting.
Dodge & Burn: Paint over natural highlights on cheekbones or clothing with slight exposure increases to give the final image hand-sculpted dimension.
Nancy’s Pro Tip: Press O anytime while editing to toggle your red mask overlay on and off. If an edit ever starts looking fake or overdone, click on that specific mask layer and lower the Amount slider at the top of the masking panel to dial down the intensity!
Free Resource! Stop Guessing & Streamline Your Edits
Mastering local masks is a game-changer, but having a smooth, stress-free routine for the rest of your workflow is how you cut your editing time in half. Grab these free guides to build serious confidence behind the screen:
Download the Free Lightroom Editing Workflow: Tired of tweaking sliders back and forth hoping a photo magically improves? Grab my exact step-by-step editing framework so you can edit faster, make confident choices, and get gorgeous, consistent results every single time.
🎨 Ready to Fully Master Lightroom & Edit with Total Confidence?
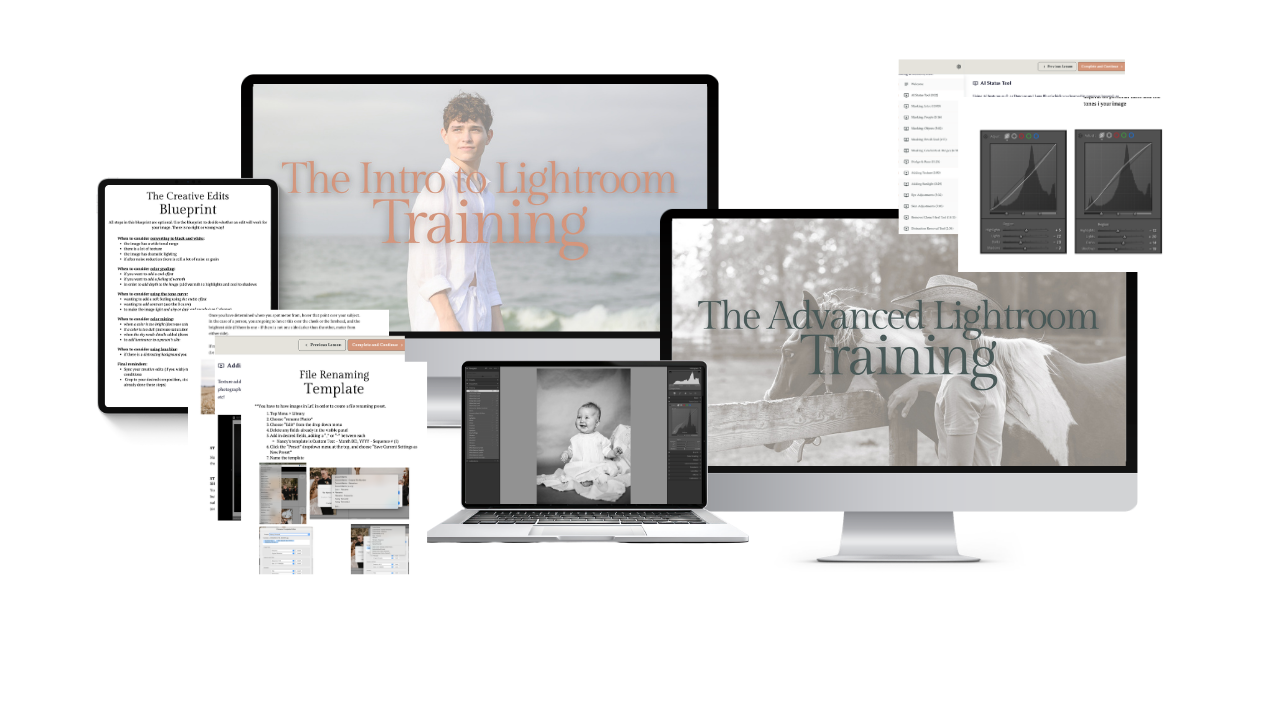
If you’re ready to move past trial-and-error, stop fighting with dark or muddy photos, and finally build an editing framework you love, I’d love to welcome you inside The Lightroom Series!
You won't be doing it alone, either—you'll be joining over 600 students who are already leveling up their editing, plus getting exclusive access to our private Facebook student group. It’s the best place on the internet to get feedback, ask questions when you get stuck, and cheer each other on every step of the way!
Whether you need to overhaul your digital organization or master advanced editing techniques, The Lightroom Series gives you the exact blueprint to:
Build a bulletproof Folders & Catalog System so you never lose or misplace an image again.
Master local masking, precise color grading, and clean dodge-and-burn adjustments.
Develop a lightning-fast batch-editing workflow so you can spend less time stuck at your computer and more time doing what you love!
💡 Explore The Lightroom Series right here!
Search the blog for more helpful info! 👇
Needing to dive deeper? Check out…
The Camera Series— for mastering your gear.
The Lightroom Series— for editing.
AI-Powered Hail Mary Masks— for lightning fast, unmatched editing tools.
The Camera Series— for comprehensive, affordable trainings designed for beginner or intermediate photographers.
Nancy’s Recommended Gear— and where she buys it used (reputable with warranties!)