What is Soft Proofing in Lightroom and Should You Do It?
Ever perfected a photo in Lightroom, only to upload it to Instagram and wonder why the colors look... off? Or maybe you’ve sent a photo to the lab and it came back looking dull and muddy?
You’re not alone! It’s one of the most common frustrations photographers face, and the answer lies in a powerful, yet often overlooked tool: Soft Proofing.
Think of Soft Proofing as your photo's "dress rehearsal." It lets you see exactly how your image will look when it leaves your monitor and travels to a smartphone screen or a piece of paper. This way, you can fix any color "surprises" beforethey happen!
Why Your Monitor Lies (Just a Little Bit!)
Your high-end camera and computer monitor can capture and display a huge range of colors—way more than a standard phone screen or a home printer ever could.
This is called a "Wide Gamut." It’s awesome for editing, but it means your monitor is showing you colors that simply don't exist in the "internet world" (sRGB) or on a printed page.
Ready to master the "math" of your images? Just like understanding your camera's native Aspect Ratio is key for printing, Soft Proofing is the key for color. If you want to stop guessing and start knowing exactly how your tools work, this is exactly what I dive deep into inside The Lightroom Series. I’ll show you how to take full control of your workflow from import to export.

Soft Proofing for Social Media (Yes, It's Crucial!)
Many photographers think Soft Proofing is just for printing, but it's actually your secret weapon for making your photos "pop" on the feed.
When you export for Instagram, the app converts your image to sRGB. If you haven't checked your soft proof, those vibrant blues and reds might turn into solid "blobs" of color with no detail. Soft proofing lets you see those "out of bounds" colors so you can fix them before the algorithm crunches your file.
How to Soft Proof in 3 Easy Steps (+ video tutorial!)
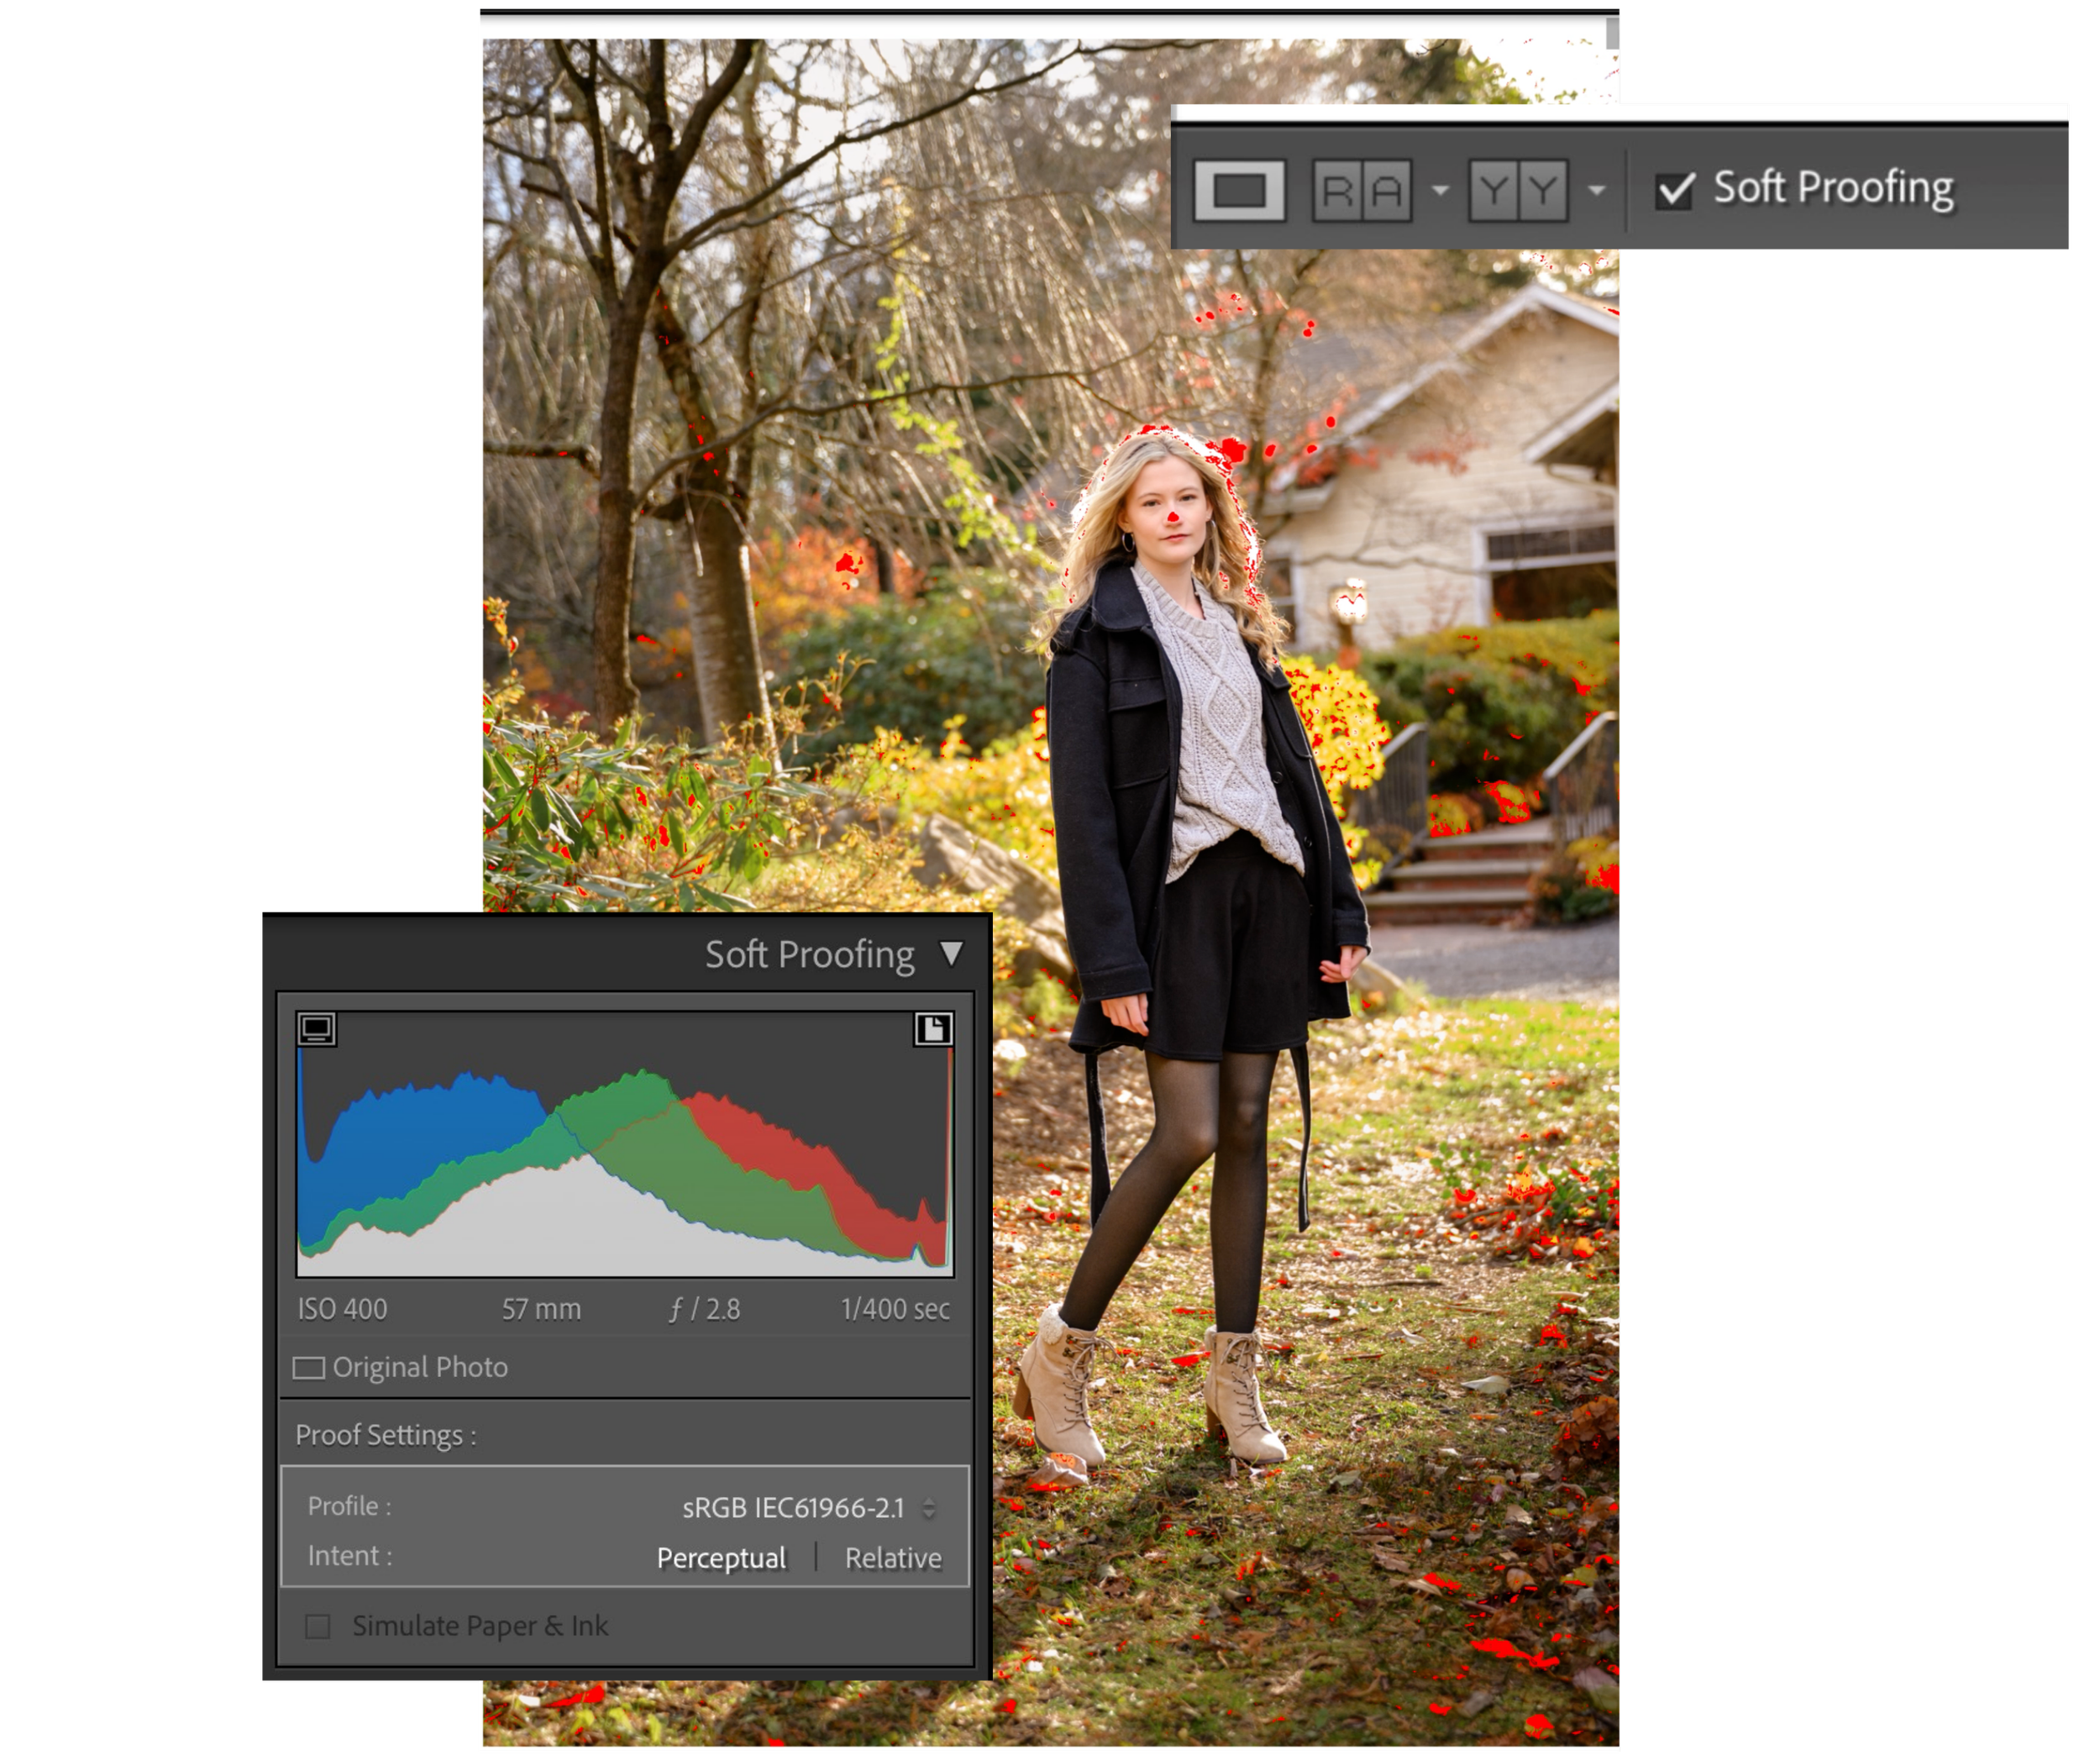
1. Enable Soft Proofing Press the 'S' key in the Develop Module. Set your Profile to sRGB for web or your specific lab profile for print.

2. Check the "Red Zone" Warning Click the small icon that looks like a paper on the top right of your Histogram (the Destination Gamut Warning). If you see RED on your photo, Lightroom is telling you: "Hey, these colors are too saturated for the web and they're going to lose detail."
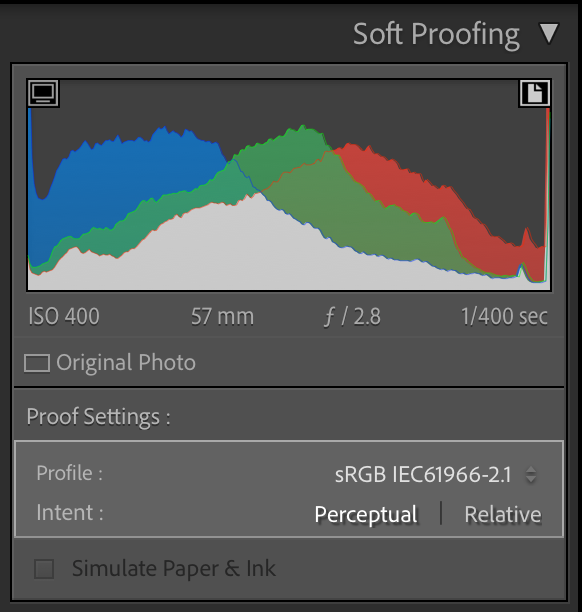
3. Create a Proof Copy & Fix Always click 'Create Proof Copy' so you don't mess up your original edit! Then, use the HSL panel to gently pull down the saturation or luminance of those red-alert colors until the warning disappears.
Confused by the HSL panel? Don't worry—you aren't alone. In my affordable trainings inside of The Lightroom Series, I dedicate entire lessons to these and all of the editing tools in Lightroom. We don't just talk about which sliders to move; I teach you the why behind the Color, Tone, and Masking tools so you can create the signature look you've always wanted.
Troubleshooting the "Flat" Look
If your photo looks "milky" or flat when you turn on soft proofing, don't panic.
For Web: Make sure "Simulate Paper & Ink" is unchecked.
For Print: If it looks dull, it’s just the simulation of ink on paper. You might need to add a tiny bit of contrast or "Dehaze" to your proof copy to bring back that punch.
Stop Guessing, Start Creating
Soft proofing is the final "sanity check" that separates the pros from the amateurs. It ensures that the hard work you put into your edit actually makes it to the final viewer.
If you’re tired of "poking around" in Lightroom and feeling overwhelmed by all the buttons, come join us in The Lightroom Series. I built these trainings to be the ultimate shortcut for photographers who want to spend less time behind a computer and more time behind the lens—all while producing better images than ever before.
Needing to dive deeper? Check out…
AI-Powered Hail Mary Masks for lightning fast, unmatched editing tools.
The Camera Series for comprehensive and affordable trainings suitable for beginner or intermediate photographers.
Nancy’s Recommended Gear and where she buys it used (reputable with warranties!)