Mastering the Kelvin Scale for Perfect White Balance
Are you tired of your camera’s "Auto White Balance" guessing wrong? While preset modes (like 'Sunny' or 'Cloudy') get you close, the one setting that gives you total, professional control over color is the Kelvin Scale.


The Kelvin scale isn't just a number—it’s a precise measure of the color temperature of the light you are shooting in. By learning to use it, you take over the job your camera often botches, resulting in images with consistent, beautiful, and accurate color every single time.
This guide will show you how to read the Kelvin scale and when to dial in the perfect number.
Kelvin: The Color Temperature Thermometer
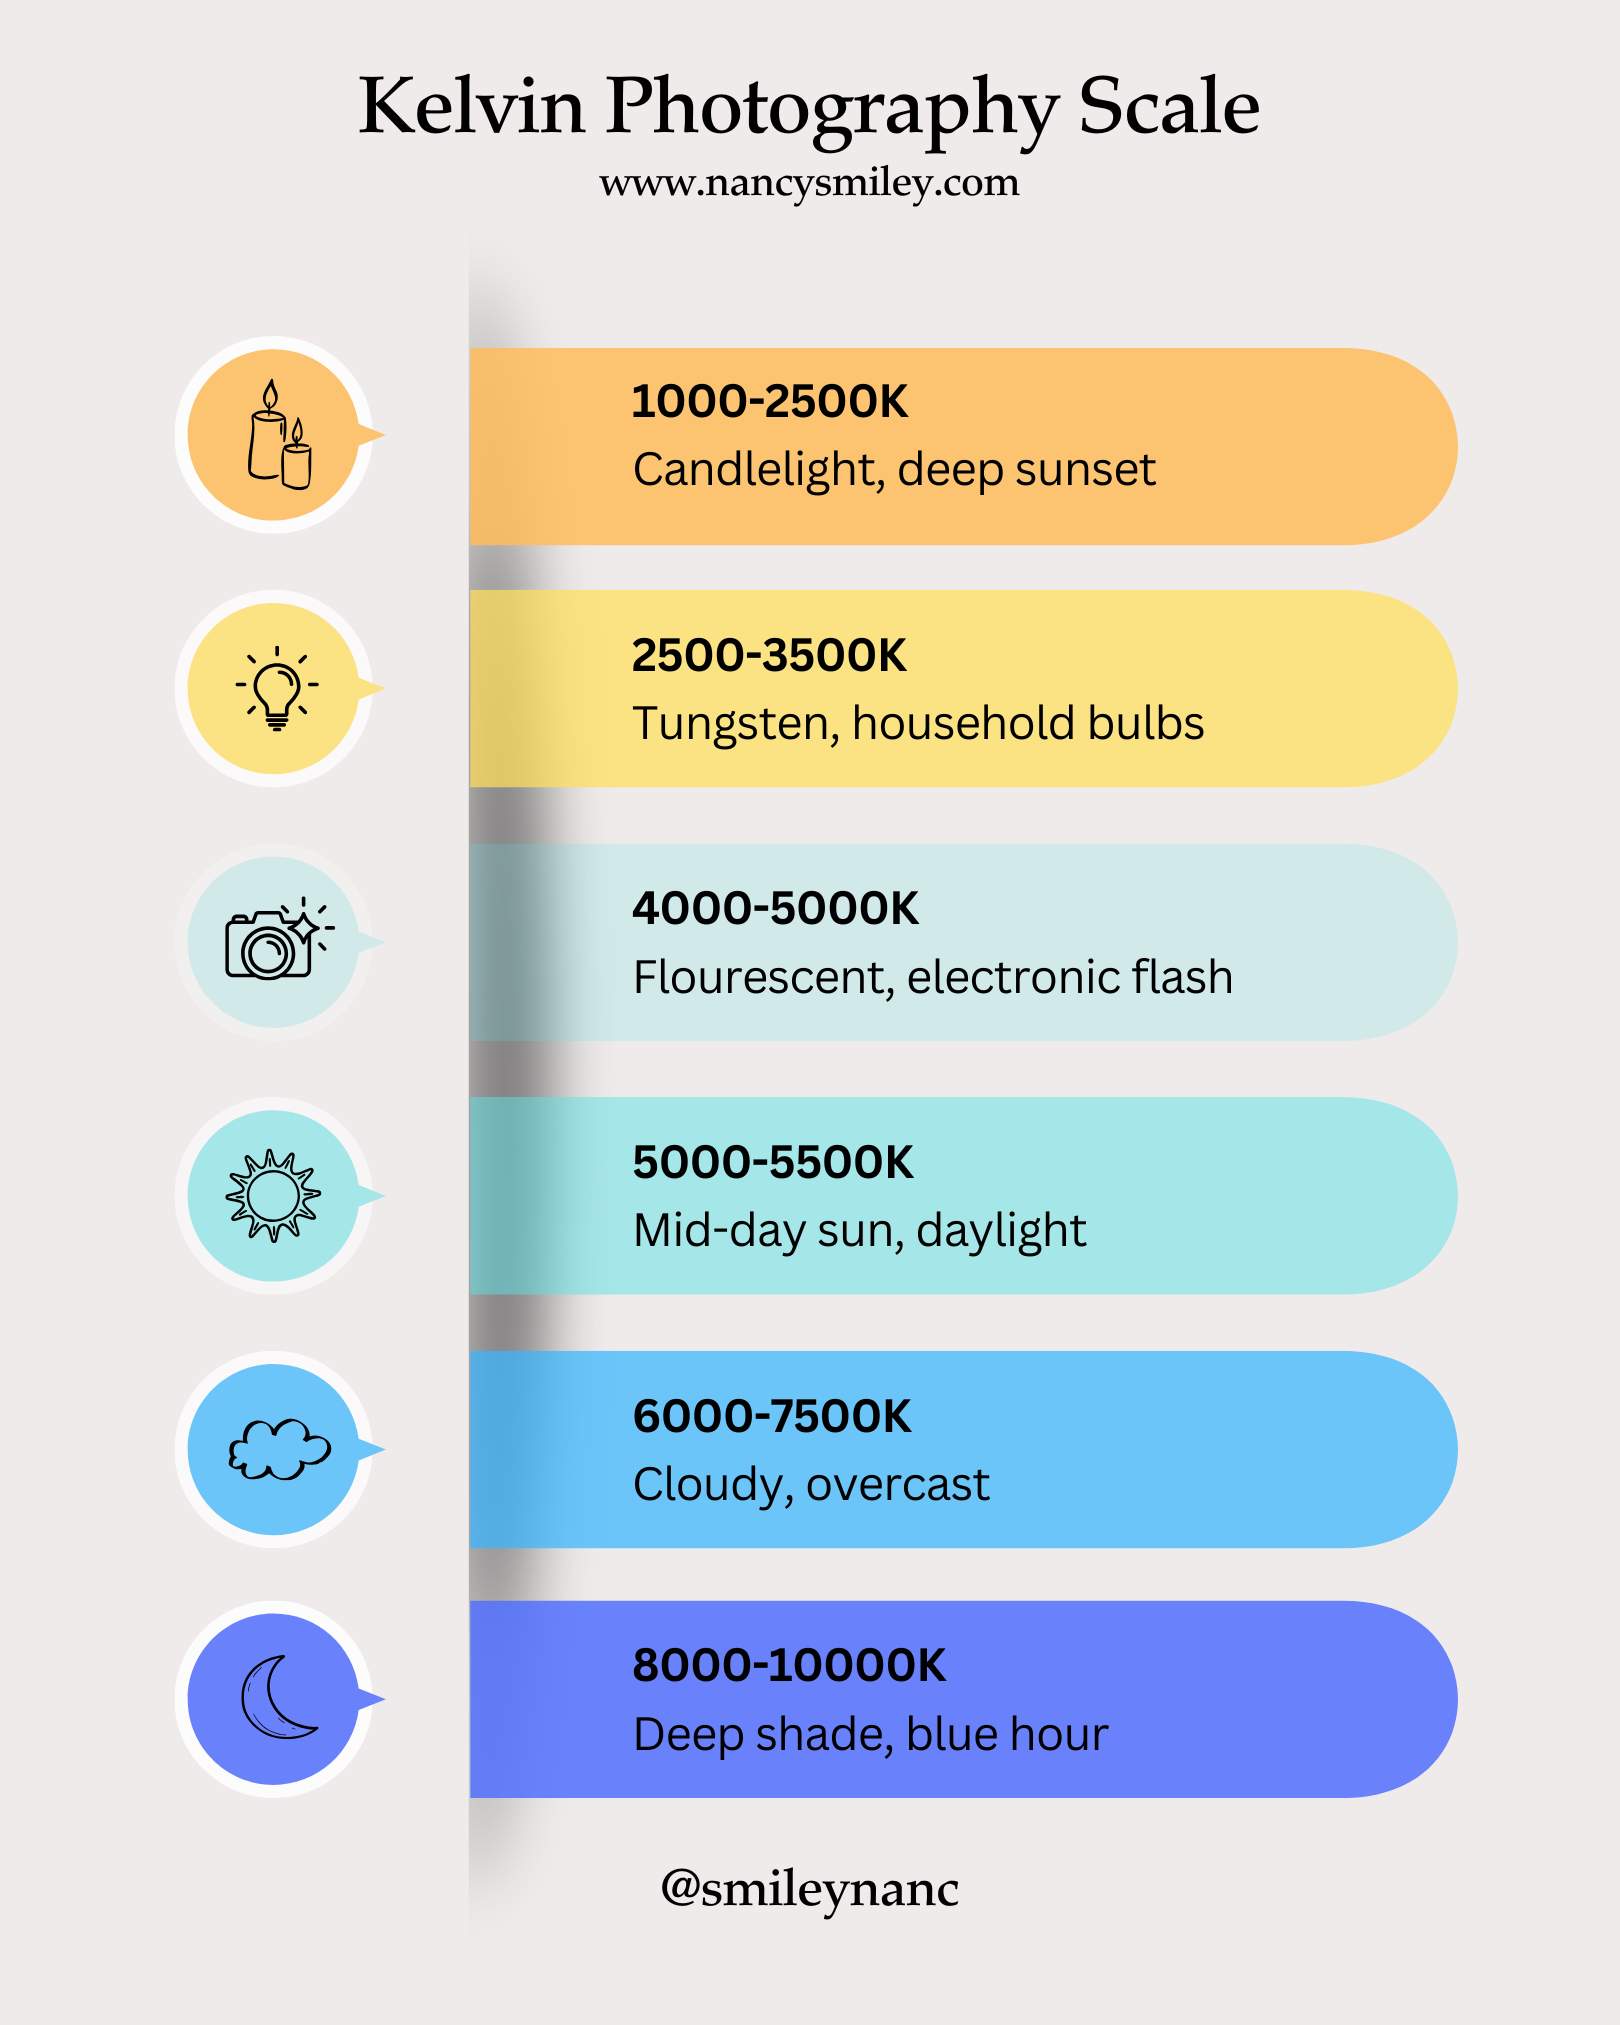
Think of the Kelvin scale (K) as a thermometer for light. The lower the number, the warmer the light source is (more red/orange). The higher the number, the cooler the light source is (more blue).
This concept is essential for any photographer learning to shoot in full manual mode, as it directly impacts how you interact with light.
Essential Kelvin Reference Chart
Use this quick chart as your starting point when setting Kelvin in-camera.
The Trade-Off: Pros and Cons of Kelvin
While the Kelvin scale gives you ultimate control, it’s helpful to know its advantages and disadvantages compared to other White Balance methods (like Auto or Presets).
👍 Pros of Using Kelvin
Maximum Consistency: Unlike Auto WB, which shifts color constantly, Kelvin guarantees the same color output every time you shoot under the same light.
Creative Control: You can intentionally dial in a lower number (to warm up a scene) or a higher number (to cool down a scene) to set a specific mood.
Precision: If you know your lighting equipment’s exact Kelvin rating (e.g., a studio strobe at 5600K), you can dial it in perfectly.
👎 Cons of Using Kelvin
Steeper Learning Curve: You have to know what numbers correlate to specific light sources (e.g., memorizing 3200K is tungsten).
Requires Checking: In complex or mixed lighting, there is still an element of trial and error before you find the right number.
Not Available on All Cameras: Entry-level cameras sometimes only offer presets and custom WB, but not the direct Kelvin input.
How to Set Kelvin White Balance in 3 Steps
Not all entry-level cameras have the Kelvin setting, but if yours does (usually labeled 'K' in the White Balance menu), here’s how you use it:
Step 1: Check Your Light Source
Look around the scene and determine the primary light source. Are you shooting outside on a sunny day (5500K), or indoors under warm household lamps (3000K)?
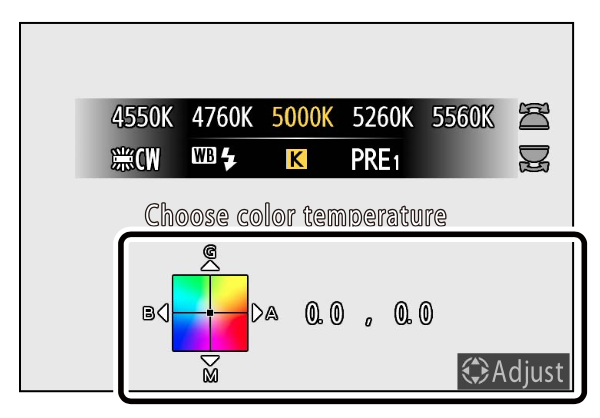
Step 2: Dial in the Starting Number
Based on the chart above, dial in the corresponding Kelvin number. For example, if it's an overcast day, start by setting your White Balance to 6500K.
Pro Tip: How to Check
If you shoot with a mirrorless camera, you have a huge advantage: you’ll see the Kelvin change reflected in real-time right on your electronic viewfinder or rear screen!
If you use a DSLR with an optical viewfinder, you won’t see the change until you capture the image. You'll need to take a quick test photo, then zoom in on the display screen. In either case, look closely at any pure white areas in your image to confirm the color is true to life—not too blue, yellow, or magenta.
Step 3: Refine and Tweak to Taste
Take a test shot. Does the image still look a little too cool? Dial the number up (e.g., from 6500K to 7000K) to add warmth. Does it look too warm? Dial the number down to add coolness.
This process gives you far more consistency than Auto WB, which will change the color temperature every time you recompose your shot.
Advanced Workflow: Shortcut Your White Balance
Once you get comfortable with the Kelvin scale, you’ll want to be able to adjust it instantly without diving into your camera's menu. This is the hallmark of a professional workflow!
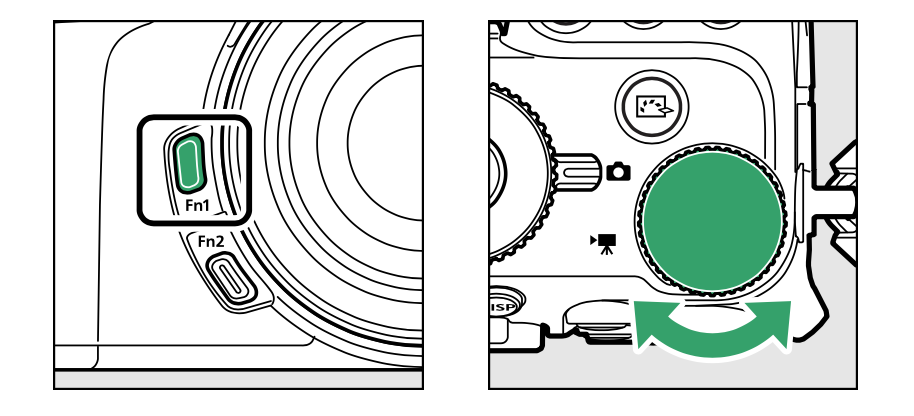
To avoid diving into the camera menu every time you need to adjust the Kelvin temperature, use your camera’s custom controls! Many professional cameras (like the Nikon Z7ii) allow you to assign White Balance settings to a custom function button (e.g., Fn1) and use a command dial to quickly adjust the Kelvin number. This dramatically speeds up your manual process, letting you tweak your color temperature instantly without taking your eye from the viewfinder.
Pro Tools for Perfect Kelvin
Even with the Kelvin scale, sometimes your eye needs a little help. To get a truly perfect reading in-camera, pros use tools to find a true neutral.
Gray Card: A simple, affordable 18% gray card is the perfect tool for setting a custom white balance. You can find excellent, highly-rated ones on Amazon for under $10.
ExpoDisc: For the ultimate custom white balance tool, an ExpoDisc is a light-metering tool that sits right over your lens. They are pricier but incredibly fast and accurate.


Want to Master Manual Mode and Take Full Control?
Learning to set your white balance by Kelvin is a huge step toward mastering your camera. But if you're ready to take full creative control over all your settings—Aperture, Shutter Speed, ISO, and Light—it's time to dive into my complete course.
The Camera Series gives you the step-by-step framework to fully understand and utilize the Exposure Triangle and the Kelvin scale, so you can stop guessing and start creating stunning, consistent images in any lighting situation.
Stop relying on Auto. Start creating with intent.

Needing to dive deeper? Check out…
The Lightroom Series for editing.
AI-Powered Hail Mary Masks for lightning fast, unmatched editing tools.
The Camera Series for comprehensive and affordable trainings suitable for beginner or intermediate photographers.
Nancy’s Recommended Gear and where she buys it used (reputable with warranties!)