6 Ways to Nail Your White Balance (And the One Pros Never Skip)
White balance (WB) is one of the most critical elements in photography. It dictates the color temperature of your image, ensuring that whites look white and skin tones look natural, not tinged blue or yellow. While many photographers rely on Auto White Balance (AWB), mastering the other five methods will save you hours of color correction in post-processing.
This guide breaks down every single way you can set your white balance, from the automatic defaults to the absolute gold standard used by professionals.

The Six Methods for Setting White Balance
1. Auto White Balance (AWB) - The Default
This is the setting most cameras default to, where the camera analyzes the scene and attempts to neutralize the color cast.
When to Use It: Casual shooting, outdoor scenes with consistent daylight, or when light conditions change too rapidly to manually adjust (like action sports).
The Downside: AWB is inconsistent. It guesses, and its guess can change drastically from one shot to the next, especially in complex lighting or if you slightly shift your composition. This inconsistency forces you to color-match every image in your editing software.
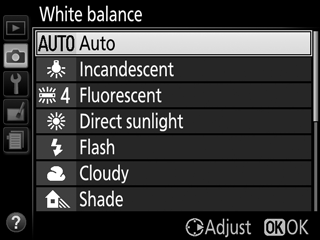
2. Built-in Presets - The Ballpark Fix
Your camera comes loaded with presets that correspond to common light sources. These are a quick step up from AWB because they remove the "guessing" and apply a fixed color temperature correction.
When to Use It: When you are shooting in a single, predictable light source (e.g., a cloudy day or a room lit purely by standard light bulbs).
The Downside: These are fixed, ballpark numbers. Not all light bulbs are 3200, so you will often still need a minor adjustment.
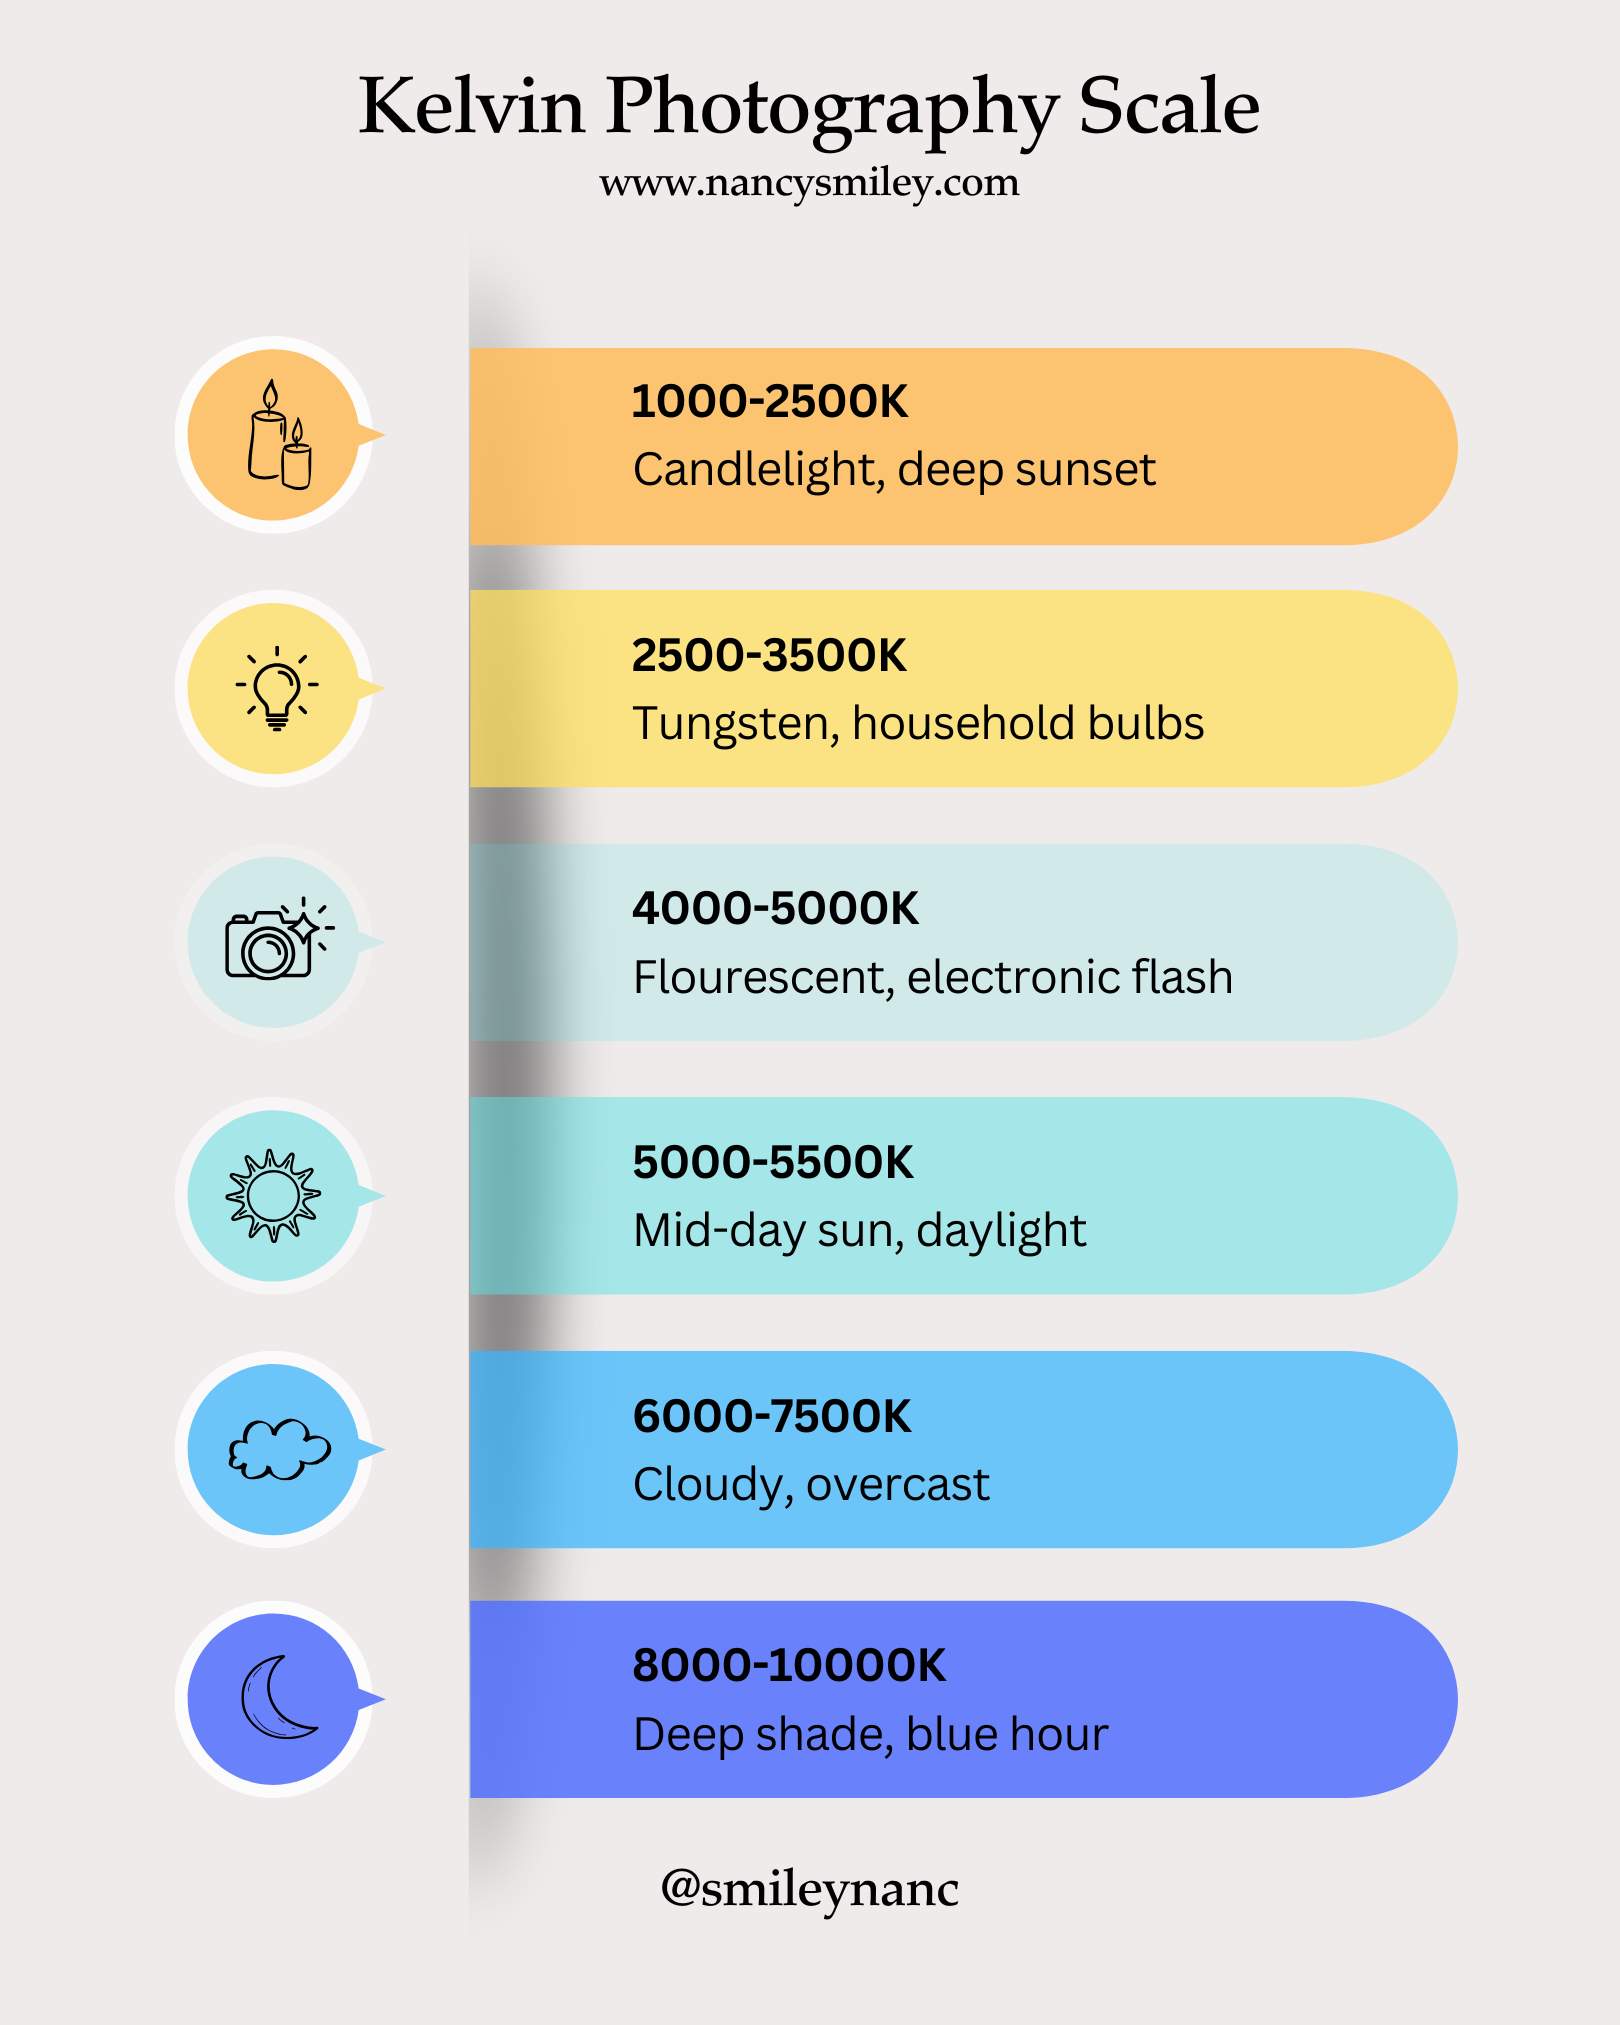
3. Kelvin (Manual K) - The Pro Choice
Kelvin allows you to dial in the exact color temperature number you want, giving you total creative control and consistency. This is the one method pros never skip for controlled shoots.
When to Use It: In professional studio setups, when shooting raw to apply creative warmth/coolness, or in any situation where color consistency is paramount.
Need a deep dive? I covered this in detail. Read our complete guide to Mastering the Kelvin Scale for a reference chart and pro workflow tips. Click here for the full Kelvin guide
4. Custom White Balance (Manual WB) with a Tool
This is the most accurate method available. By telling your camera what "white" or "neutral gray" looks like, it can calculate and neutralize the exact color cast in the scene.
Place a neutral target (Gray Card, White Balance Cap, or ExpoDisc) where your subject is.
Fill the frame with the target.
Take a test shot.
Tell your camera to use that image as the custom white balance reference.
When to Use It: Critical color work, portraiture, product photography, or whenever lighting is complex (e.g., mixed window light and household light).
🛠️ Recommended Tools for Custom WB
Gray Card/White Balance Card: A simple, affordable $18\%$ gray card is the perfect neutral target. It's a must-have for every camera bag.
ExpoDisc or Lens Cap Filter: These tools fit over your lens, making the custom WB process faster by eliminating the need to have someone hold the card.
Not all entry-level cameras have the Kelvin setting, but if yours does (usually labeled 'K' in the White Balance menu), here’s how you use it:


5. Custom White Balance with a Neutral Element - The Emergency Fix
If you forget your gray card, you can use any neutral white or gray object in the scene—a white paper napkin, a gray sidewalk, or even the white lid of a coffee cup—to set your custom WB.
The Downside: It's only as accurate as the object you use. If the napkin has blue undertones, your image will be skewed. Use this only when a dedicated tool isn't available.
6. Post-Processing - The Last Resort
The final method is correcting the white balance in your editing software (like Lightroom). While shooting RAW files allows you to change the White Balance perfectly after the fact, it still requires manual adjustment on every image, adding significant time to your workflow.
The Rule: Always try to get your white balance right in the camera. Using methods 3 or 4 will ensure consistency and let you spend less time editing and more time creating.
Need a deep dive? Here’s a blog post about how to fix white balance in Lightroom! White Balance Editing

Want to Master Manual Mode and Take Full Control?
If you're ready to take full creative control over all your settings—Aperture, Shutter Speed, ISO—it's time to dive into my complete course.
My affordable trainings inside of The Camera Series gives you the step-by-step framework to fully understand and utilize the Exposure Triangle and the Kelvin scale, so you can stop guessing and start creating stunning, consistent images in any lighting situation.
Stop relying on Auto. Start creating with intent.

Needing to dive deeper? Check out…
The Lightroom Series for editing.
AI-Powered Hail Mary Masks for lightning fast, unmatched editing tools.
The Camera Series for comprehensive and affordable trainings suitable for beginner or intermediate photographers.
Nancy’s Recommended Gear and where she buys it used (reputable with warranties!)