Metering Modes 101: Get Perfect Exposure Every Time
Have you ever taken a photo of a beautiful sunset or a child playing in the snow, only to look at your screen and see a muddy, dark mess? It’s frustrating, right? You have the vision, you have the gear, but for some reason, your camera just isn't "seeing" what you see.
The culprit is usually your metering mode.
So, what is metering?
Metering is simply how your camera “looks” at a scene to decide how much light is there. If you’re in Auto mode on your camera, your camera takes that information and makes all the decisions for you. In Manual, your camera is "metering" to tell you where your exposure is.
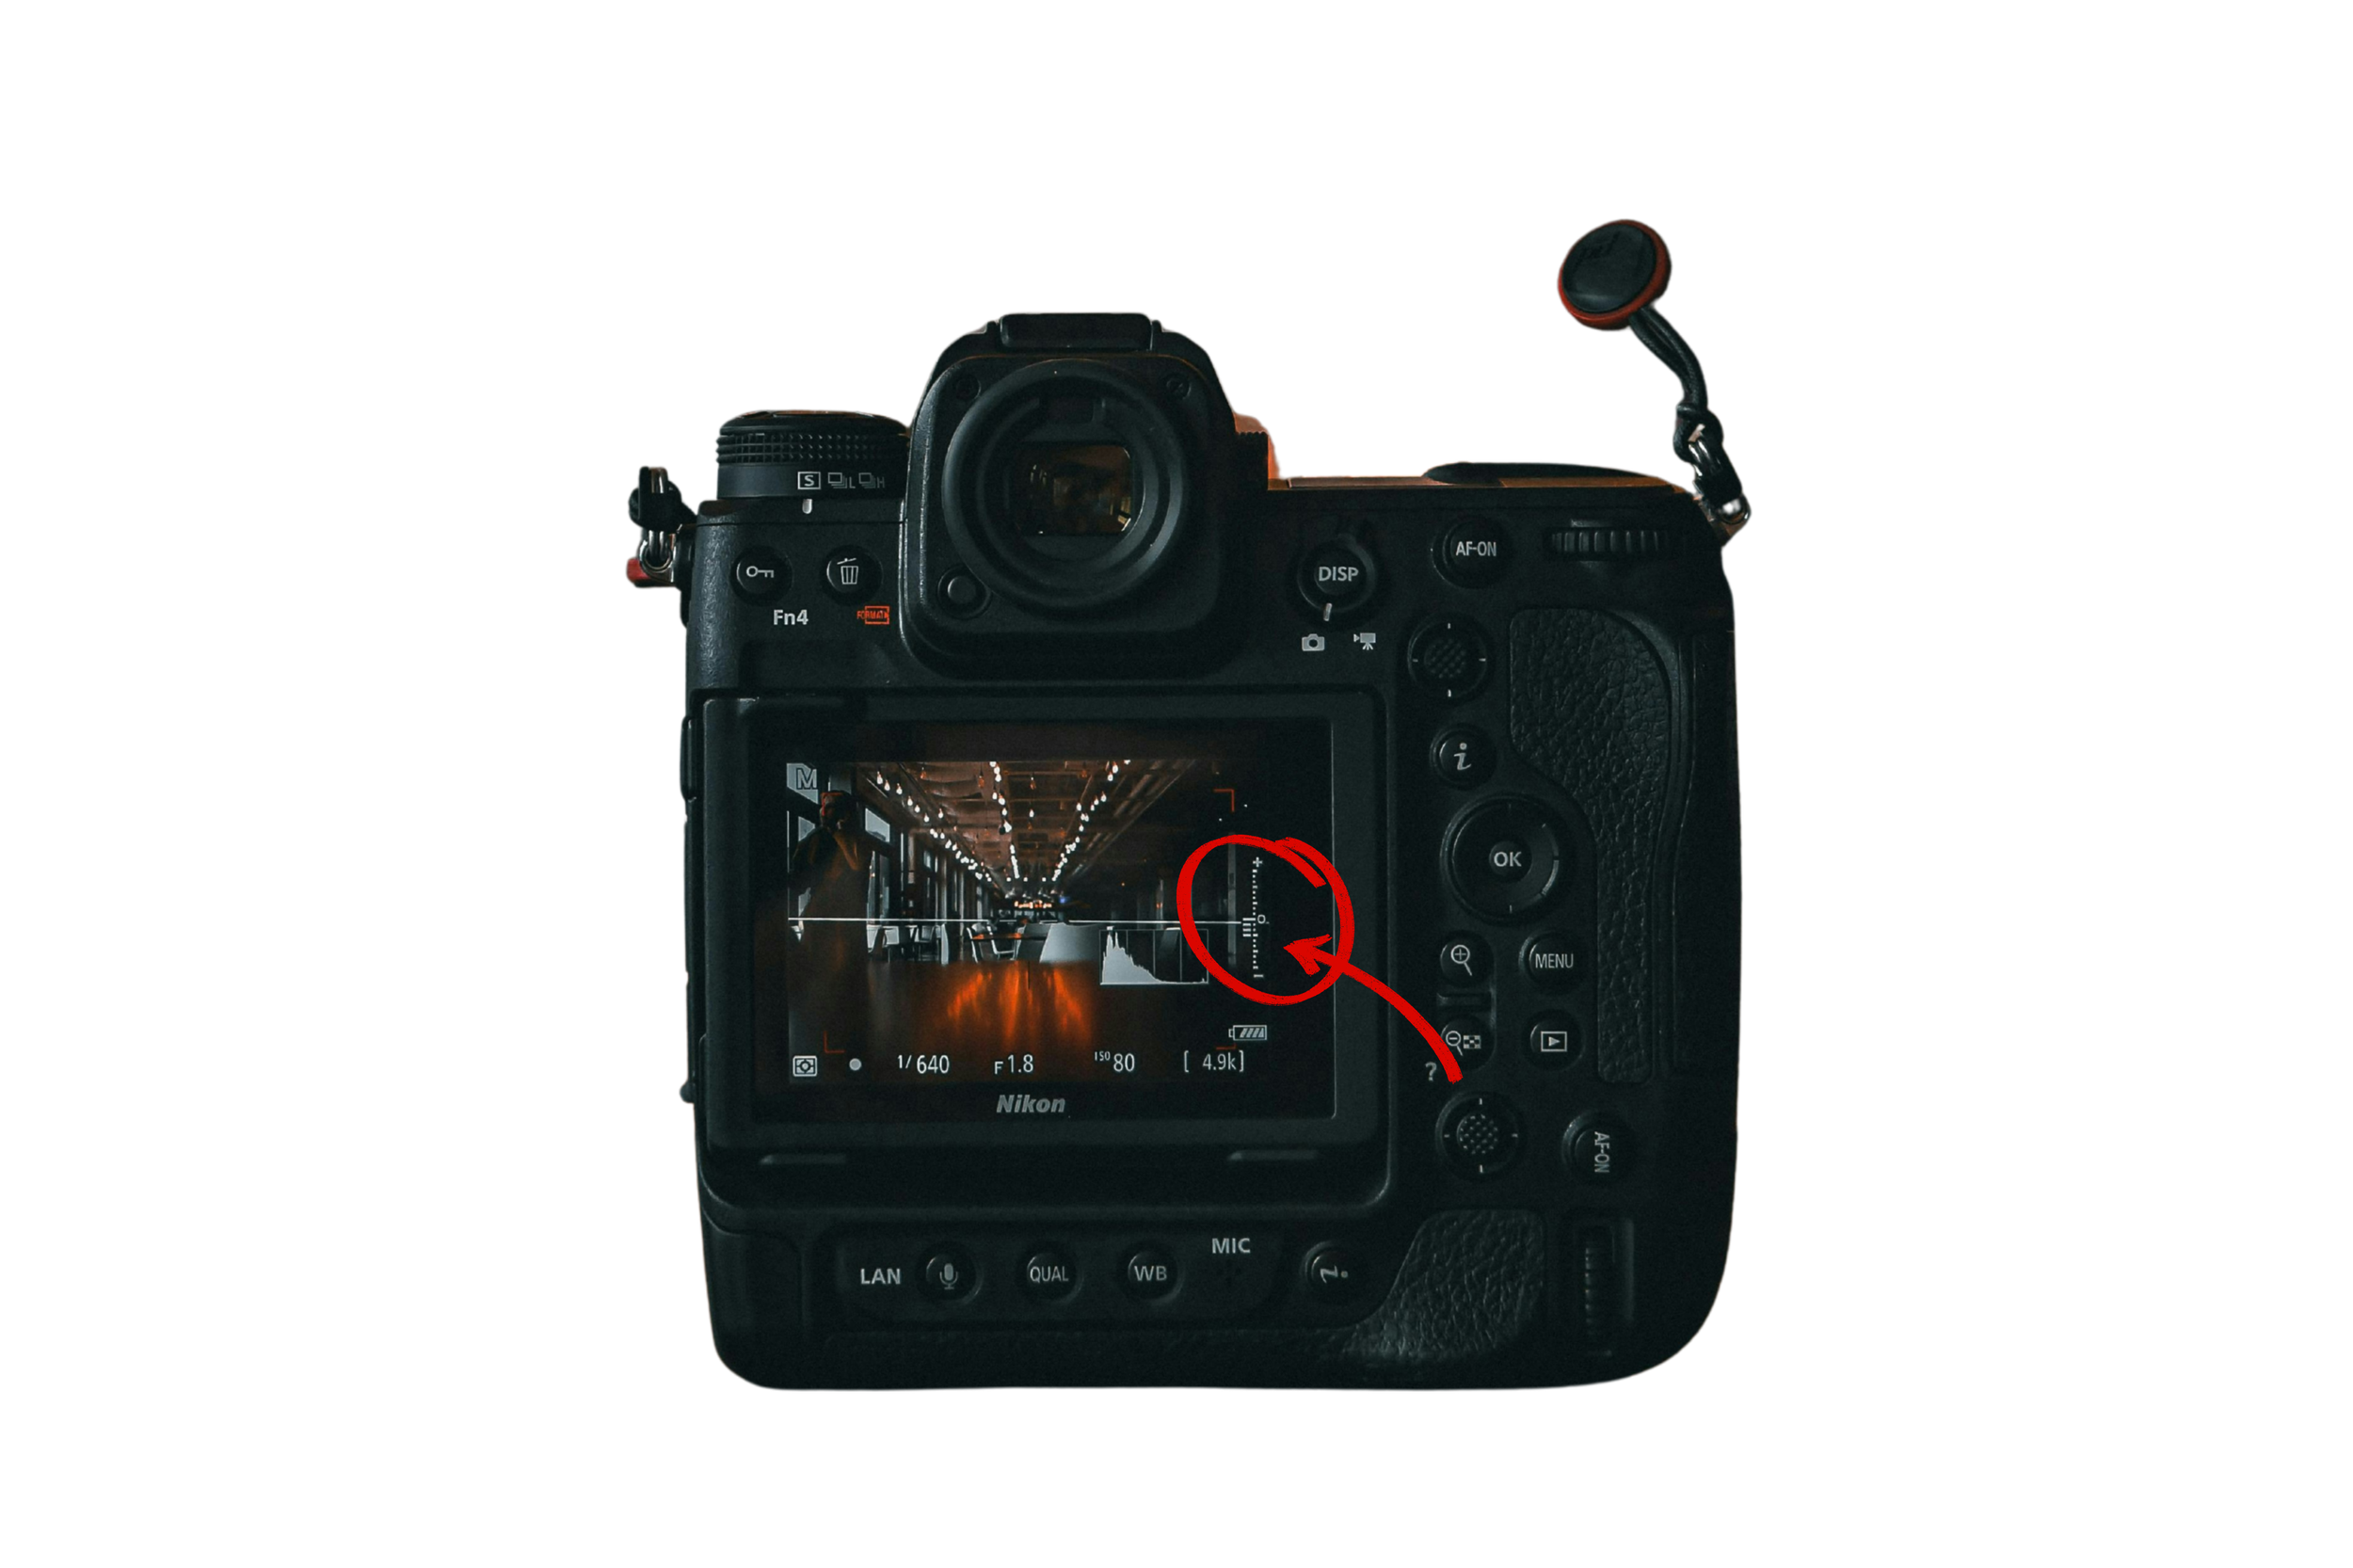
Once it “meters” (or reads) the light, it gives you a reading of exposure on your light meter. The indicator line being towards the negative icon means the image is underexposed - too dark. If the indicator line were up towards the positive icon, that would mean the image is overexposed - too bright.
The problem? Your camera is a piece of equipment, not an artist. It doesn't know you’re trying to capture a dreamy silhouette; it just thinks the sky is too bright! To take back control, you need to understand the three main ways your camera "measures" light.
1. Evaluative / Matrix / Multi Metering
This is the "Generalist" mode and is usually the default setting on most cameras. In this mode, your camera looks at the entire scene, divides it into a grid of zones, and tries to find a "middle ground" exposure.
What it's called: Evaluative (Canon), Matrix (Nikon), Multi (Sony/Fujifilm).
How it works: It looks at the light, the darks, and even the focus point to give you a balanced "average."
Best for: Evenly lit landscapes or snapshots where the light is consistent across the whole frame.
The Downside: It’s easily fooled! If there’s a bright window behind your subject, this mode will try to "save" the bright window, leaving your subject’s face in the dark.
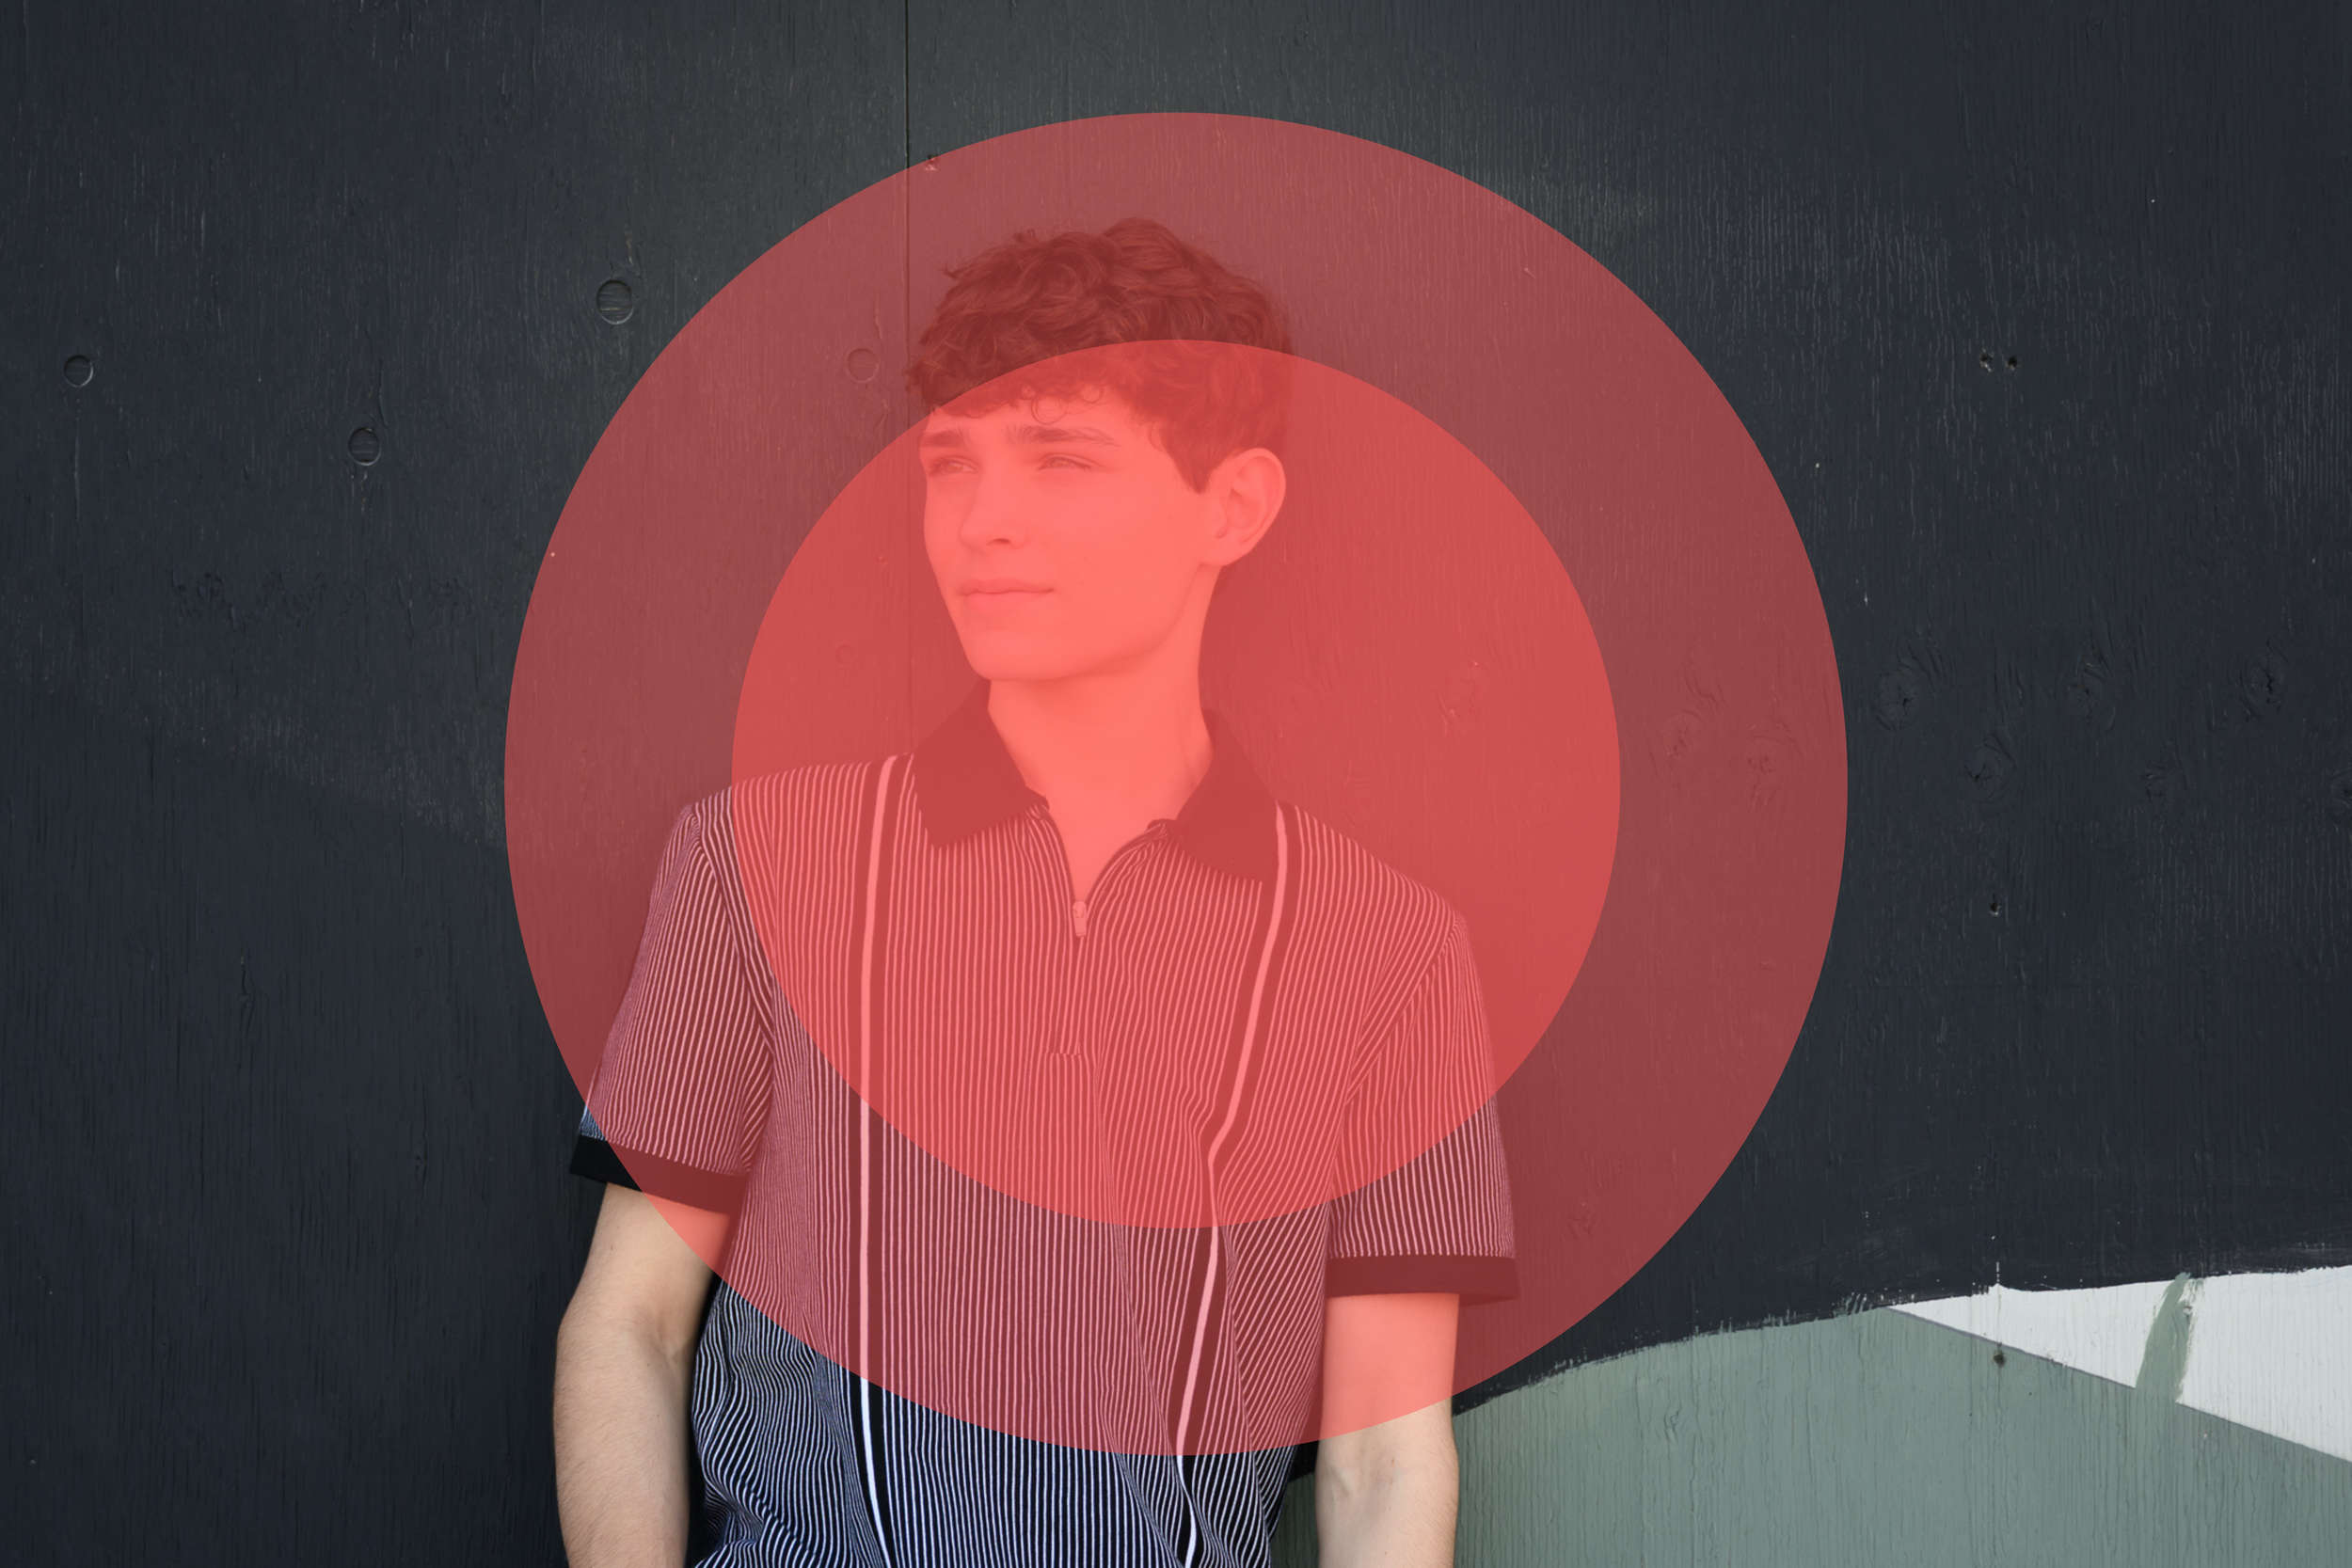
Check out this sample image below. I’ve added a big red square to where the camera would be “looking” at the light to measure the exposure necessary.

2. Center-Weighted Metering
Think of this as the "old school" choice. In this mode, the camera still looks at the whole frame, but it gives much more importance (or "weight") to the area in the center.
What it's called: Center-Weighted (Canon, Nikon, Sony, Fujifilm).
How it works: It assumes that whatever is in the middle of your shot is the most important thing and ignores the edges of the frame when calculating the "perfect" light. It gives greatest consideration to the inner most circle (in the image example below).
Best for: Portraits where your subject is smack-dab in the center or headshots with a simple background.
The Downside: If you like to use the "rule of thirds" and place your subject off to the side, this mode will likely give you an incorrect reading.
💡 Pro Tip: If you're feeling a bit overwhelmed by these different modes and how they change your dials, I’ve got you! Grab my Free Manual Mode Camera Settings Cheat Sheet. It’s a handy reference guide you can keep in your camera bag so you never have to wonder what your settings should be in different lighting.
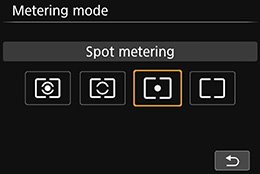
3. Spot Metering
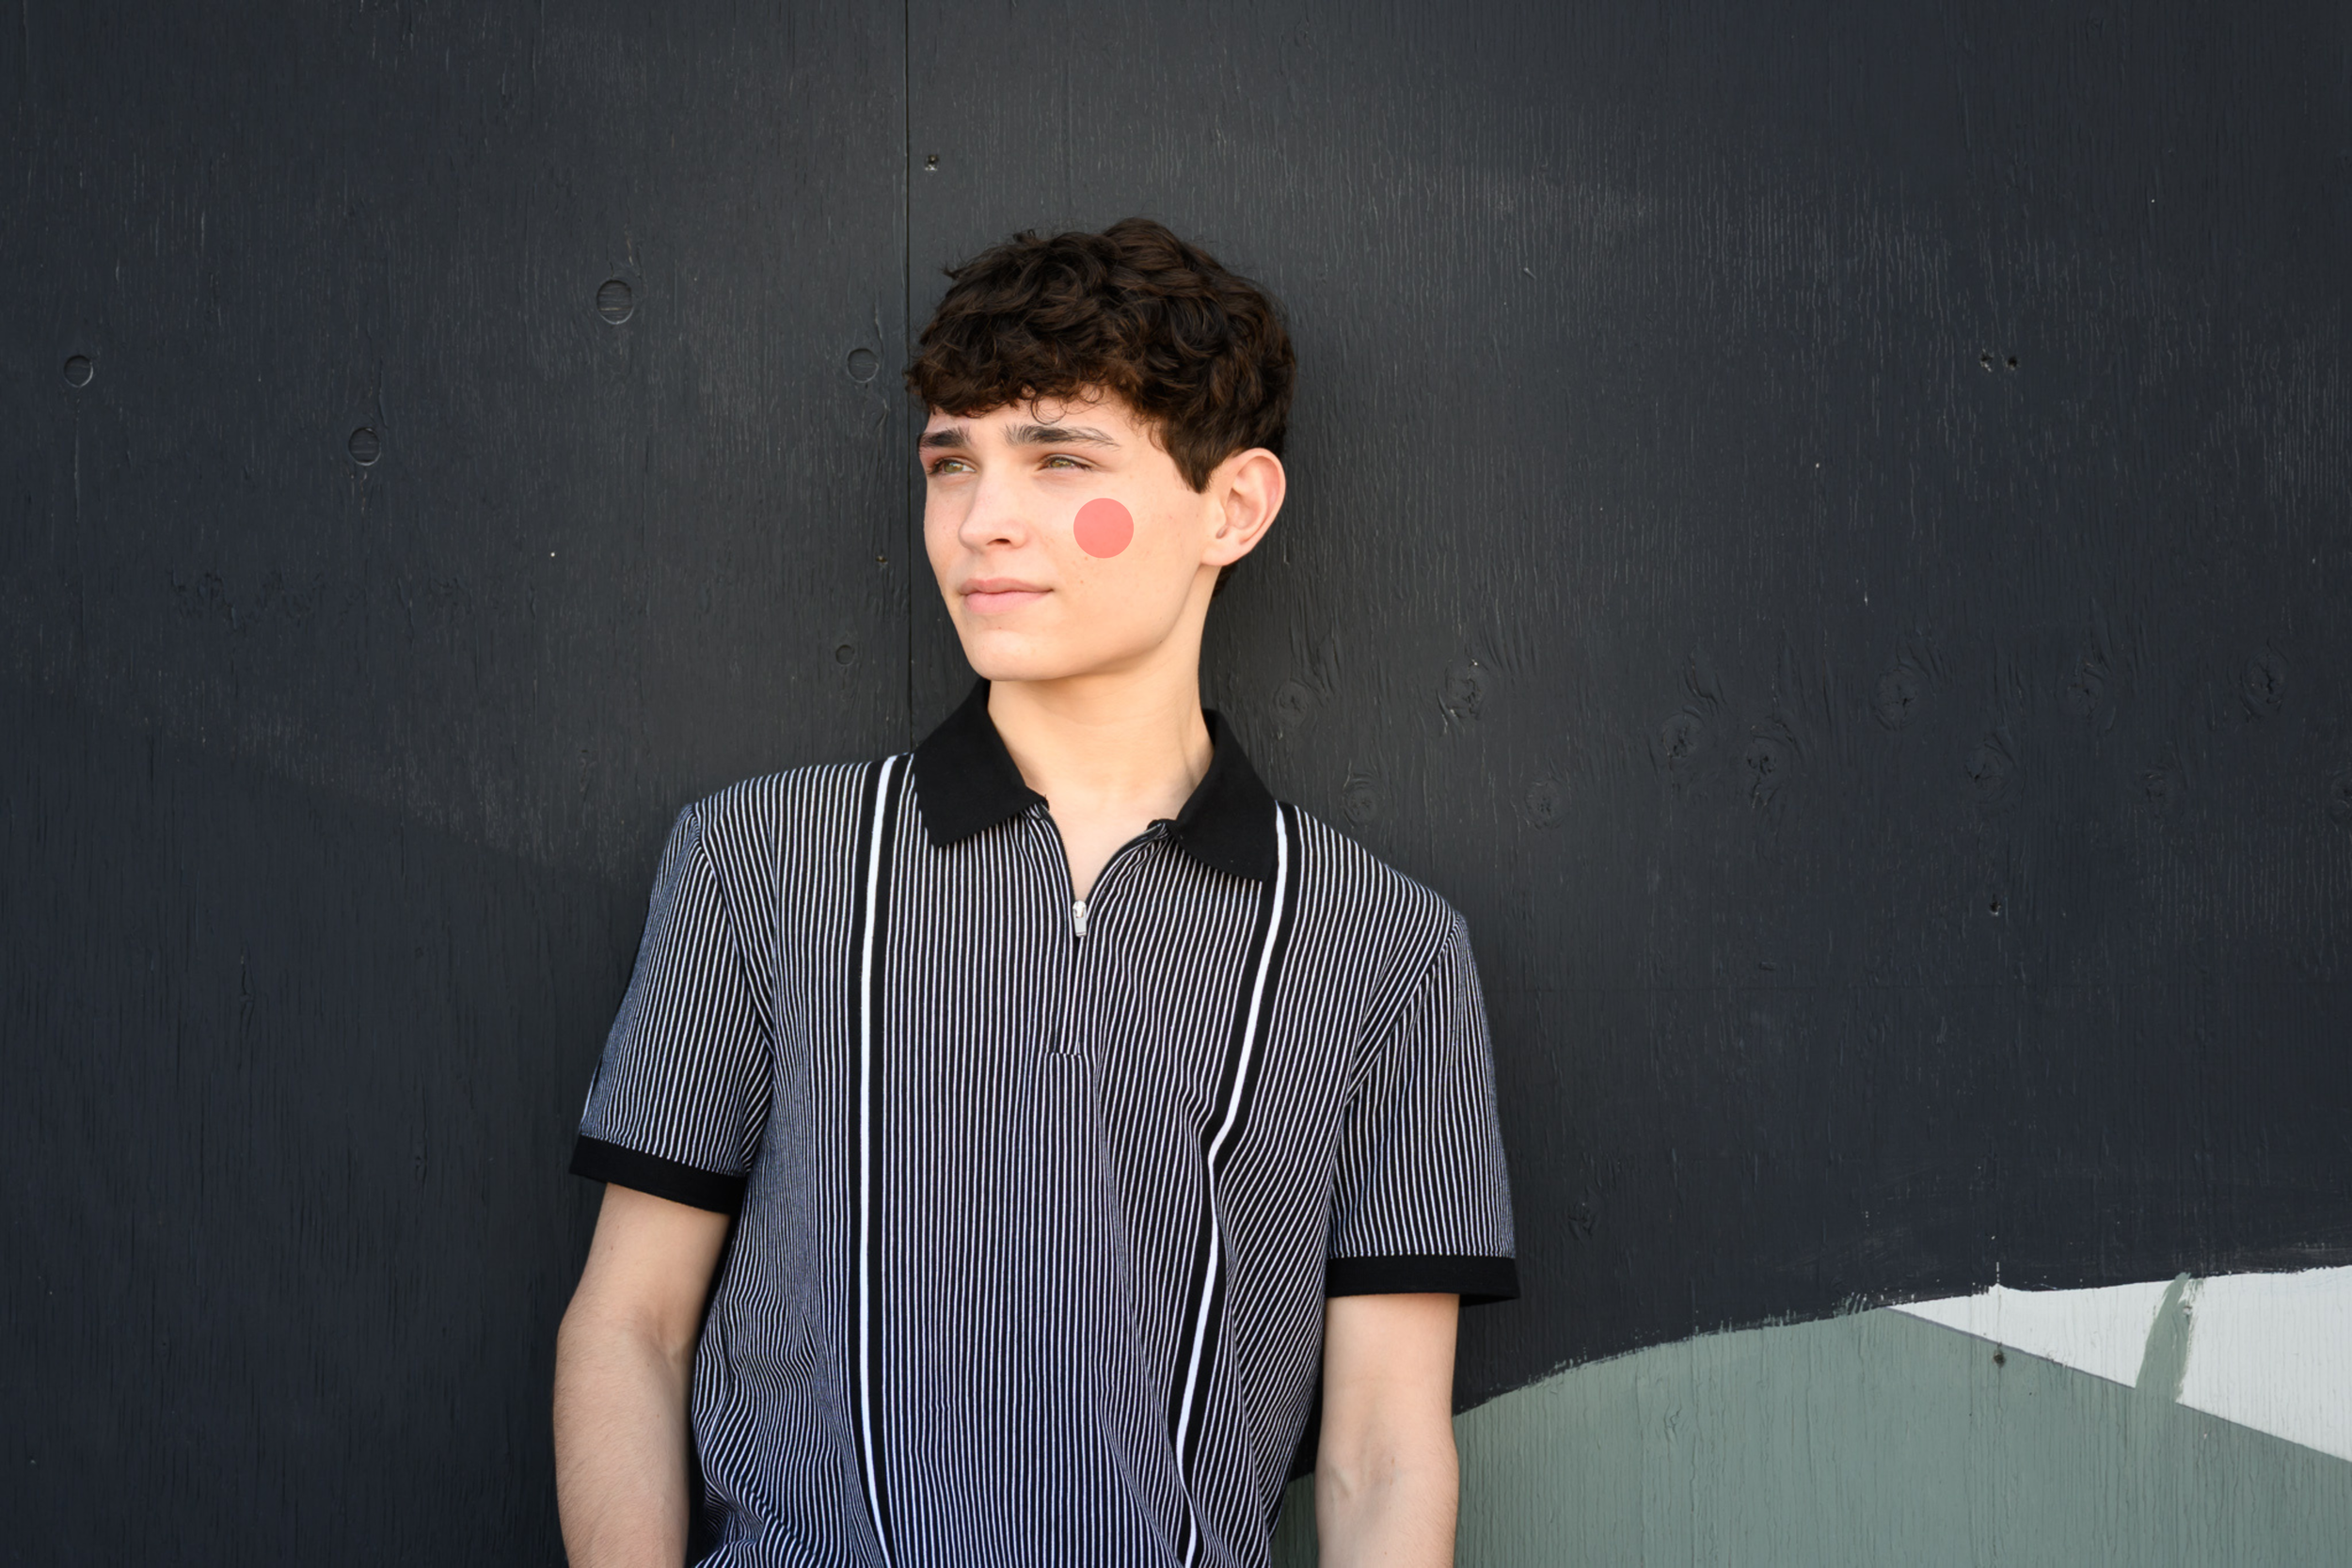
This is my personal favorite and the one I use almost 100% of the time. Spot metering tells your camera to ignore the rest of the world and focus only on a tiny little spot (usually around 2–4% of the frame).
What it's called: Spot Metering (Canon, Nikon, Sony, Fujifilm).
How it works: You are telling the camera exactly what matters. If I’m taking a portrait, I want the exposure to be perfect for my subject's skin—I don’t care if the background is a little "blown out" or dark!
Best for: Backlit subjects, silhouettes, snowy scenes, or any time there is high contrast.
4. Partial Metering (The "Spot Light" alternative)
Mainly found on Canon cameras, this works like a "bigger" spot meter. If a camera doesn’t have spot metering, is is the next best thing.
What it's called: Partial Metering.
How it works: It covers a slightly larger area than spot metering—usually about 10–15% of the center of the frame.
Best for: When your subject takes up a good portion of the frame but the background is still much brighter or darker than they are.
5. Average Metering (The Fujifilm Specialty)
Fujifilm users have a unique option that differs slightly from the standard "Multi" or "Center-Weighted" modes.
What it's called: Average (Fujifilm).
How it works: Unlike Multi/Matrix, which uses a complex algorithm, Average simply takes the mathematical average of the entire frame's light.
Best for: When you want extremely consistent exposure across a series of shots in the same lighting, or for film-style shooting where you want to see the light exactly as it is without the camera "helping" you too much.
6. Highlight-Weighted Metering (The Nikon Power-Move)
If you’re a Nikon shooter (or have a newer Sony body), you might see a symbol that looks like a metering icon with a little asterisk or "star" next to it. This is Highlight-Weighted Metering.
What it's called: Highlight-Weighted (Nikon, Sony).
How it works: This mode is like a bodyguard for your highlights. It specifically searches the frame for the brightest areas and adjusts the exposure to make sure they don’t "blow out" (turn into pure, detail-less white).
Best for: Concerts, theater performances, or dance recitals where your subject is under a bright spotlight against a dark background. It ensures the performer's face isn't a white blob!
The Downside: Because it’s so focused on saving the highlights, the rest of your image might end up looking quite dark. You’ll likely need to pull up the shadows in post-processing.
Which Mode Should You Use?
If you are just starting out, Evaluative/Matrix/Multi is a safe "all-rounder." But as you start playing with more creative light—like that gorgeous golden hour backlight—you’ll find that switching to Spot Metering is the "lightbulb moment" that changes everything.
However, a quick word of warning: Spot metering works best when you are in Manual Mode. If you try to use it in a semi-auto mode (like Aperture Priority), your exposure will jump all over the place every time you move your camera slightly!
✨ Take Total Control of Your Art If you’re tired of "chimping" (taking a photo, checking it, and trying again) and you want to truly master your gear, check out The Camera Series. My trainings are comprehensive and affordable, and my students all say they went from feeling flustered by settings to shooting with total creative confidence every single time. We go way beyond just metering to make sure you can capture exactly what's in your heart.
Needing to dive deeper? Check out…
The Lightroom Series for editing.
AI-Powered Hail Mary Masks for lightning fast, unmatched editing tools.
The Camera Series for comprehensive and affordable trainings suitable for beginner or intermediate photographers.
Nancy’s Recommended Gear and where she buys it used (reputable with warranties!)